The MIDI protocol allows computers, electronic musical instruments and other hardware to communicate.
First developed in the 80s, it became the industry standard for connectivity for electronic music hardware and required either the 5 pin din midi cable or in recent years, a USB connection.
Now, with the introduction of bluetooth technology, you can “connect” your equipment wirelessly! This gives you the freedom to move around and have less clutter and still have your equipment send everything from note data to volume levels and everything else in between!
Contributed by Mark Watson for the Roland Australia Blog
Table of Contents
What is the WM-1 ?
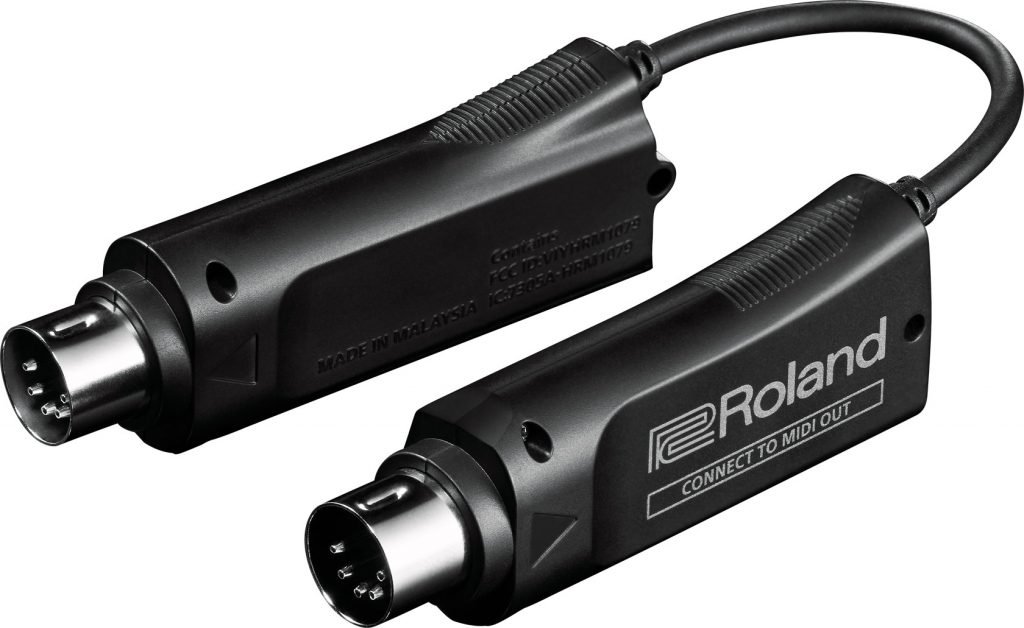
Roland have introduced the WM-1, a wireless MIDI adapter for keyboards, drum machines and other MIDI devices. It gives you very low latency at just 3 milliseconds (0.003 seconds)! This gives you super tight timing where you can’t notice any delay in performance! You can connect up to four devices giving you wireless freedom to create your music! In this article you will learn how to simply set up and use your WM-1.
What is the WM-1D ?
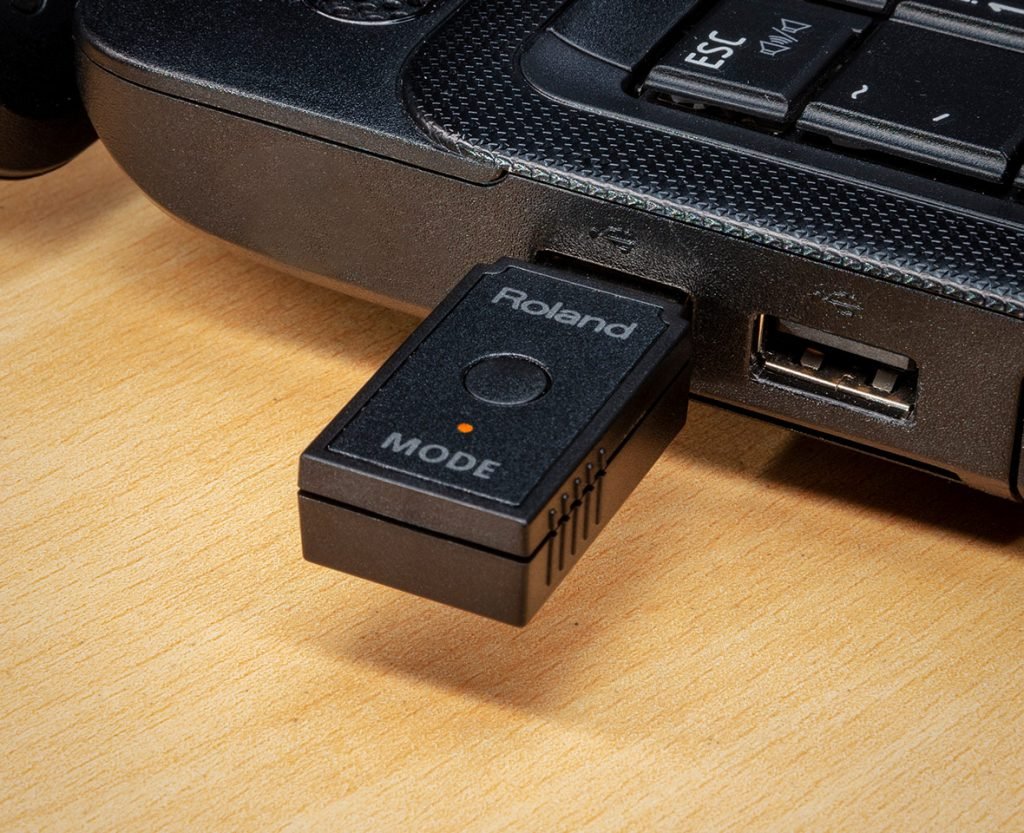
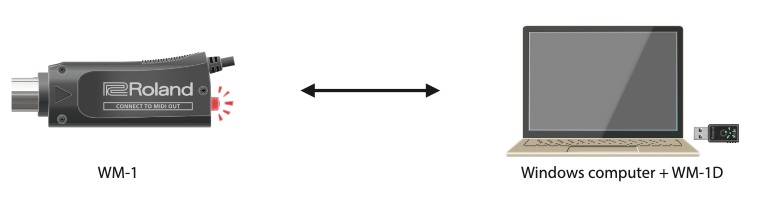
If you’re using a computer that doesn’t have Bluetooth, the WM-1D gives wireless MIDI. Plug it into an open USB port for low-latency communication with any instrument or device equipped with a WM-1/WM-1D unit, or with iOS devices and Mac computers via Bluetooth MIDI. In addition to MIDI note data, you can send MIDI sync for tempo, effects, LFOs, loops, and more—all without connecting a single cable.
What is BLE MIDI?
BLE stands for Bluetooth Low Energy. This is technology that uses Bluetooth LE to transmit and receive MIDI messages wirelessly. It is officially known as “MIDI over Bluetooth Low Energy” Bluetooth Low Energy became available in Bluetooth 4.0 and has lower power consumption and is extremely good for machine to machine communication.
Different ways to use the WM-1 and WM-1D
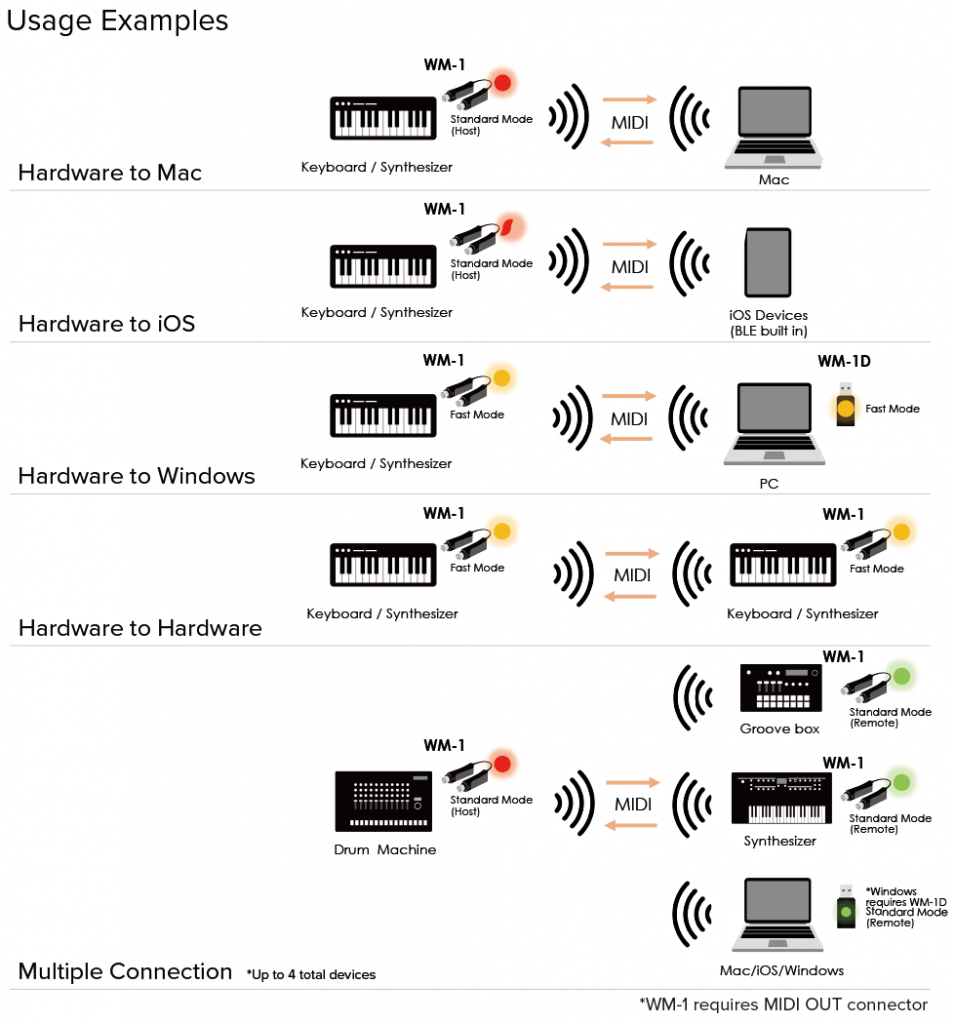
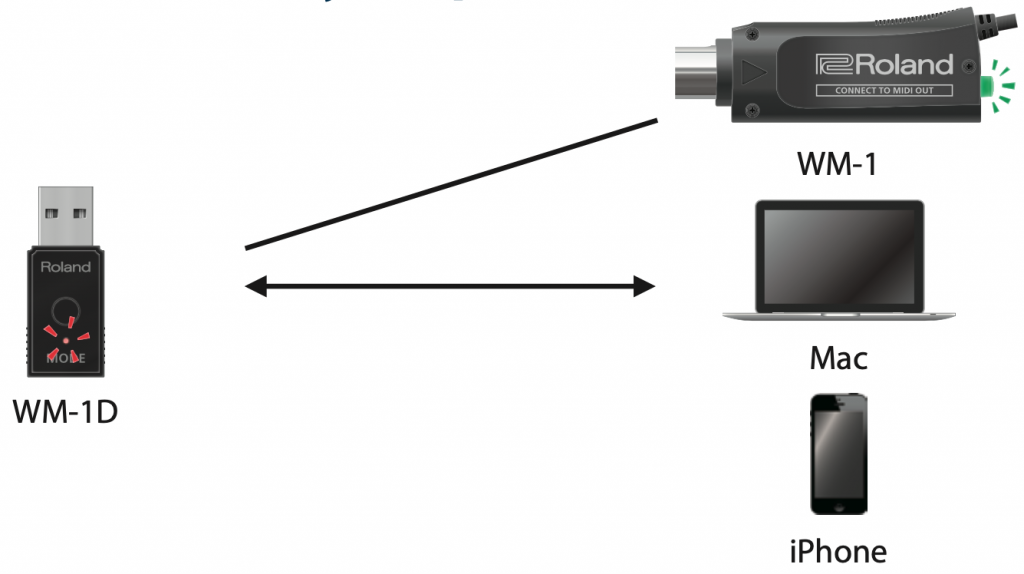
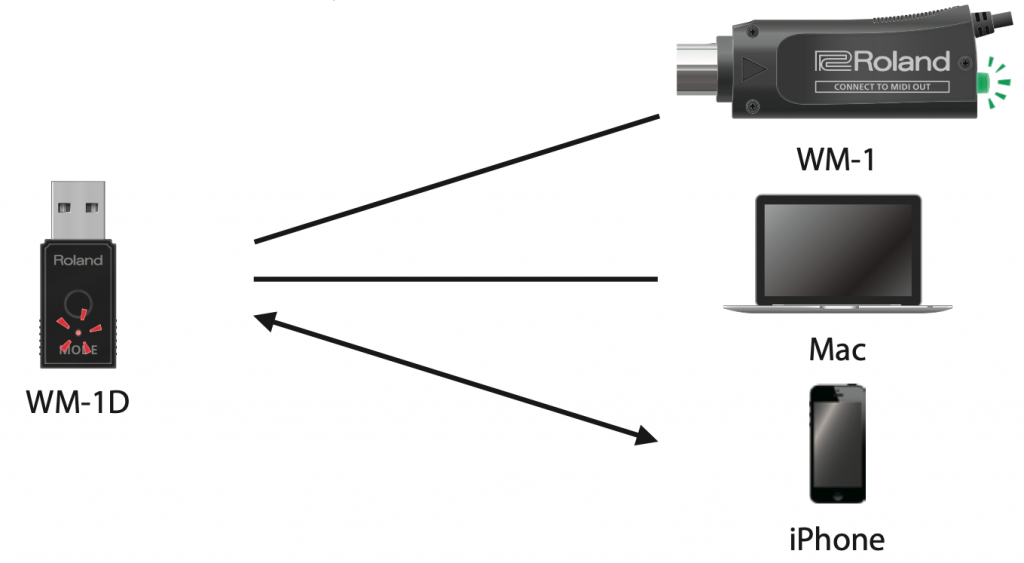
With the WM-1 your synthesiser or keyboard can communicate two ways with a Mac computer. You can play notes on your keyboard and trigger virtual instruments in your DAW. Alternatively, you can trigger your synthesiser, playing notes from within a sequence from your DAW on your Mac!
You can also have one MIDI synth play another midi synth, double, triple, or quadruply stacking your performance!
Below you can see some usage examples between synths, Mac computers, other hardware MIDI devices, Windows PCs and even IOS devices like an iPhone or iPad!
Quick Start Video
How to set up the WM-1
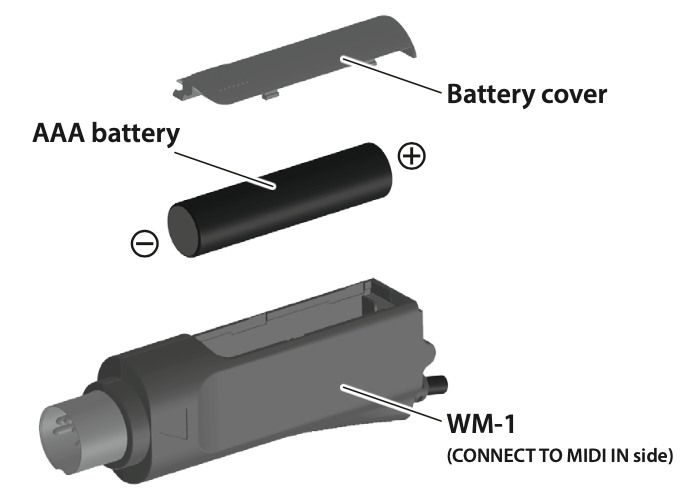
The WM-1 comes with a AAA alkaline battery. Look for the sliding battery cover on the WM-1 and insert the battery correctly. Connect the WM-1 to your MIDI device and turn on your device. The WM-1 will also automatically turn on. A red light will start to flash on the WM-1.
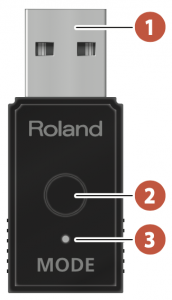
How to set up the WM-1D
The WM-1D simply plugs into your Windows computers USB port. The button (2) enables you to switch between the two communication modes. Read further to learn how to pair and switch between modes for both models.
Setting the Communication Mode
There are two types of communication modes.
STANDARD MODE – In STANDARD mode, you can connect to a Mac or smartphone that supports BLE MIDI, or connect to the WM-1D connected to a computer. Up to three BLE MIDI devices can be connected to a WM-1 unit that is in STANDARD mode. You can connect not only the WM-1D, but also a Mac or smartphone. STANDARD mode has two modes: STANDARD (Host) and STANDARD (Remote).
FAST MODE – In FAST mode, you can connect with a lower latency than STANDARD mode. One WM-1/WM-1D unit can be connected to a WM-1/WM-1D that is in FAST mode.
PLEASE NOTE
A smartphone can’t be connected in FAST mode.
If you’re using a Mac with FAST mode, connect using the WM-1D.
Switching the Communication Mode
Here’s how to switch between STANDARD mode and FAST mode. Hold down the [MODE] switch for two seconds. The [MODE] switches each time you long-press the switch. THE button indicator has a coloured light and will blink and change colour accordingly.
WM-1 : “STANDARD (Host)” <-> “FAST”
WM-1D : “STANDARD (Remote)” <-> “FAST”
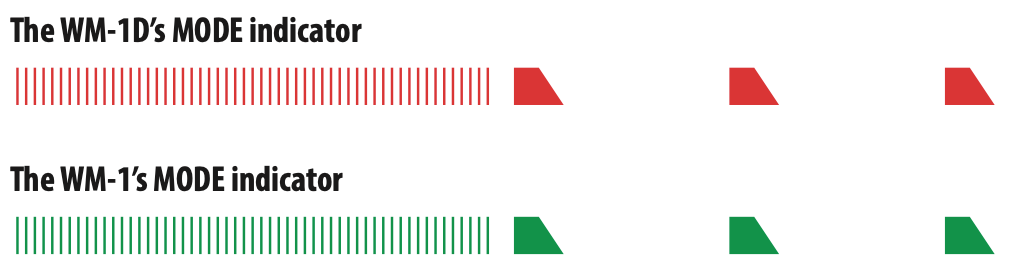
About the MODE indicator
How to pair your MIDI device
“Pairing” is the procedure of registering the MIDI device that you want to use with the WM-1/WM-1D (authenticating the devices with each other). Here’s how to make settings so that MIDI data can be transmitted and received between the WM-1/WM-1D and your MIDI device.
Please Note
Once pairing has been completed between this unit and the WM-1/WM-1D, the connection occurs automatically (memorized), and there is no need to perform pairing again. In the case of Mac or iPhone, the pairing operation is required each time.
If you initialize an already-paired WM-1/WM-1D, you must initialize the other WM-1/WM-1D unit (on Mac or a smartphone, remove the device) and perform pairing again.
When you switch the mode, pairing is cancelled.
How to use STANDARD Mode
Connecting the WM-1 with iPhone
1 . Connect the WM-1 to your MIDI device. The system begins searching for a target, and the MODE indicator blinks red for a certain length of time.The MODE indicator blinks every second
2 . From your iPhone app, directly select the WM-1. When pairing is completed, the indicator changes from blinking rapidly to slow blinking.
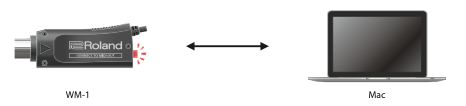
Connecting the WM-1 with Mac
Connect the WM-1 to your MIDI device. The system begins searching for a target, and the MODE indicator blinks redfor a certain length of time. The MODE indicator blinks every second.
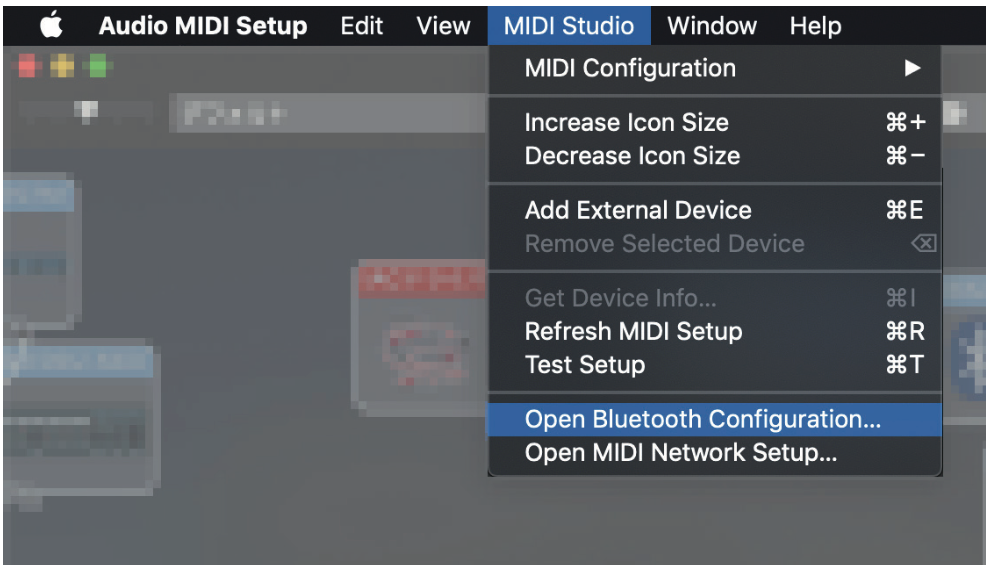
On the Mac, start Audio MIDI settings.
From the [MIDI Studio] menu, select [Open Bluetooth Configuration] to access [Bluetooth Configuration].
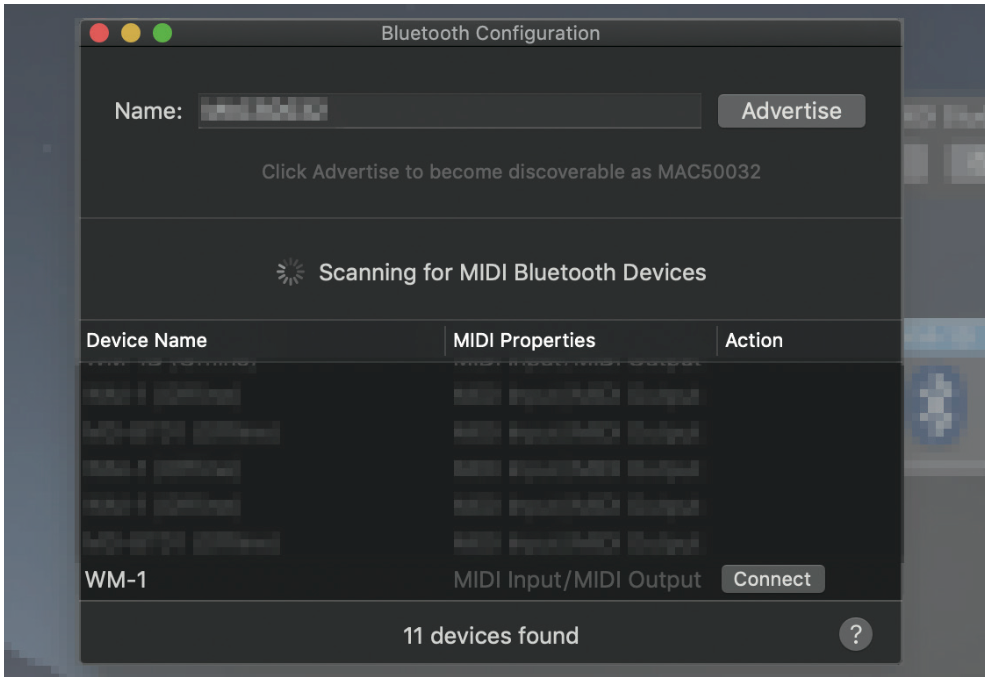
Make sure that the WM-1 is shown, and then click the [Connect] button.
If it not shown, once again briefly press the WM-1’s [MODE] switch to make the MODE indicator blink red.
When pairing is completed, the indicator changes from blinking rapidly to slow blinking.
How to connect the WM-1 to a computer without Bluetooth
Connecting the WM-1 with a Windows Computer (using a WM-1D)
Connect the WM-1 to your MIDI device. The system begins searching for a target, and the MODE indicator blinks red for a certain length of time.
Briefly press the WM-1D’s MODE switch.The system begins searching for a target, and the MODE indicator blinks green for a certain length of time. When pairing is completed, the indicator changes from blinking rapidly to slow blinking.
Please Note!
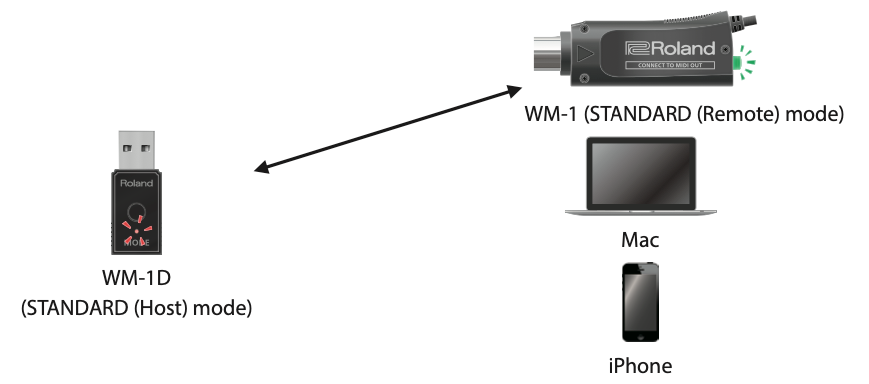
Pairing is not possible if both the WM-1 and the WM-1D are in STANDARD (Host) mode. Set one or the other to STANDARD (Remote) mode.
Pairing is not possible if both the WM-1 and the WM-1D are in STANDARD (Remote) mode. Set one or the other to STANDARD (Host) mode.
Using FAST Mode (Indicator Is Orange)
Set both of the WM-1/WM-1D units to be paired to FAST mode as I’ve described in “Switching the Communication Mode” above. The system begins searching for a target, and the MODE indicator blinks orange for a certain length of time. When pairing is completed, the indicator changes from blinking rapidly to slow blinking.
If no target is found, the MODE indicator goes dark. In this case, briefly press the MODE switch to resume pairing.
Please Note!
A smartphone cannot be paired using FAST mode.
To use FAST mode with a Mac, connect using a WM-1D
Advanced Features
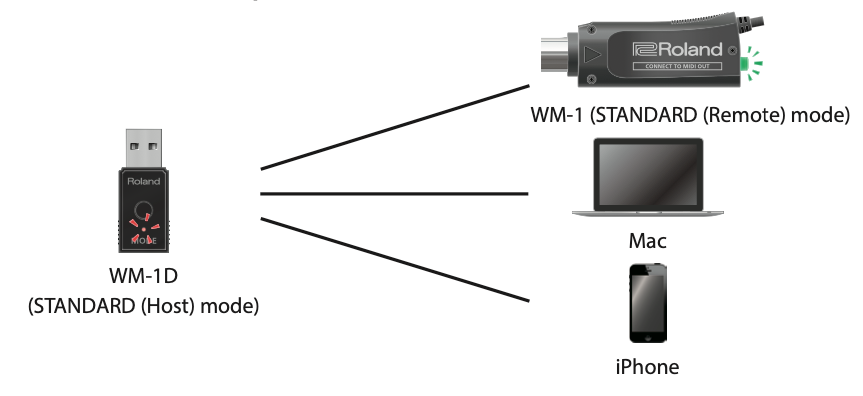
A maximum of three BLE MIDI devices can be connected to a WM-1/WM-1D in STANDARD (Host) mode (multi connection). The following BLE MIDI devices can be connected: iPhone or other iOS device, Mac, or a WM-1/WM-1D that is set to STANDARD (Remote) mode.
For details on how to set the WM-1/WM-1D to STANDARD (Remote) mode, refer to “Switching Between STANDARD (Host) Mode and STANDARD (Remote) mode” please see above. Please Note!
When pairing two WM-1 units in STANDARD mode, one of them must be in STANDARD (Remote) mode.
When using multi connection, only one unit of the same device (iPhone, Mac) can be connected
Switching Between STANDARD (Host) Mode and STANDARD (Remote) mode.
Rapidly press the MODE switch twice. The mode changes each time you press rapidly the MODE switch twice.
“STANDARD (Host) ” <-> “STANDARD (Remote)” For details on the mode and the color of the indicator, refer to “About the MODE Indicator” above.
Please Note!
When in FAST mode, pressing rapidly the MODE switch twice changes to STANDARD (Host) mode.
Connecting Three Devices to One WM-1 (Multi Connection)
Briefly press the [MODE] switch of the STANDARD (Host) mode WM-1D and the STANDARD (Remote) mode WM-1.
The system begins searching for a target, and the MODE indicator blinks for a certain length of time (the color of the indicator depends on the mode).
The WM-1D’s MODE indicator blinks every second.
The WM-1’s MODE indicator blinks every second.
When pairing is completed, the indicator changes from blinking rapidly to slow blinking.
Please Note! If you’re using an iPhone or Mac, that device will have BLE MIDI settings. In its screen, select the WM-1.
For an iOS device, select the WM-1 directly from the app.
In the same way for the second device, press the [MODE] switch briefly to pair.
In the same way for the third device, press the MODE switch briefly to pair.
How to initialise the WM-1
Sometimes you need to initialise the WM-1 to pair with brand new gear, or just to start afresh. To do this, hold down the MODE switch for ten seconds. The MODE indicator blinks orange.
When the operation is completed, the indicator goes dark.
Further help and information
If you need more details on how to connect to different devices, compatibility and general info, please visit the following Roland links.
You can also contact our Product Support department by phone or email.
If you have questions about operating your Roland product, please check our Knowledge Base for answers to the most common questions.
Scroll to Top
SIGN UP TO DOWNLOAD THIS TD-50 CUSTOM PATCHES
Created by Roland V-Drums specialist Simon Ayton, these patches were designed using the internal factory sounds and many of the techniques covered in the TD-50 guide. Enjoy exploring the possibilities!