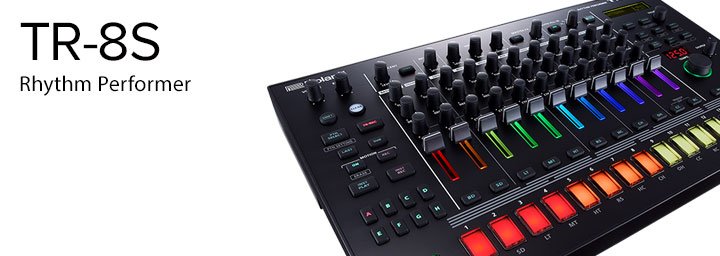
- Hold the PTN Select Button and choose one of the Pattern Banks 1-6. (Banks 7 and 8 are for User Patterns.)
- Release the PTN Select Button, press one of the Pads [1-16] to select a Pattern.
- Press the Start/Stop Button to play the selected Pattern.
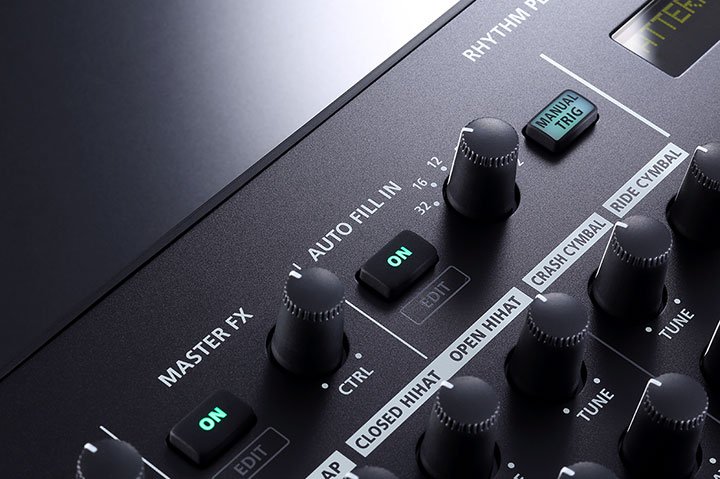
- To select a Fill, hold the Auto Fill In On Button and press Pad [14] to select Fill 1, or Pad [15] to select Fill 2.
- To play the selected Fill once, press the Manual Trig Button when you want the Fill to play.
- To play the selected Fill at regular intervals, press the Auto Fill In On Button, then turn the Auto Fill In Knob to choose how often you want the Fill to play. (With a set-ting of 2 the Fill plays every two measures, 4 every four measures, etc.)
To record your own Fill, try starting with a blank Pattern, then record a basic beat to use as a starting point for creating Fills.
To create your own Fill:
- Press the Start/Stop Button to play the selected Pattern.
- Hold the Auto Fill In On Button and press Pad [14] to select Fill 1, or Pad [15] to se-lect Fill 2.
- Hold Shift and press the Auto Fill In On Button then turn the Value Knob to select the Fill In to Edit, Fill 1 or Fill 2.
- Press the CH Button to select the Closed High Hat Instrument, then press Pads 1, 5, 9 and 13 to play High Hats on each beat as a metronome.
- Press the BD Button then press any of the Pads on which you want the Bass Drum to Play during your Fill.
- Press the SD Button then press any of the Pads on which you want the Snare Drum to Play during your Fill.
- Repeat the above step for any of the other Instruments you’d like to include in your Fill.
- Press the INST Play Button to exit the Fill In Edit Mode.
- Continue playing your Pattern and press the Manual Trig Button when you want to play your Fill.
- To play your Fill at regular intervals, press the Auto Fill In On Button, then turn the Auto Fill In Knob to choose how often you want the Fill to play.
PRO TIP
With System Update version 1.11, Roland has added a very cool feature to the TR-8S called Step Loop, a simple yet powerful tool for creating Fills and variations on the fly.
To check your System Version, Press the Utility Button, hold Shift and turn the Value Knob all the way to the right to select Information: Version, then press Enter. If your System Version is lower than 1.11 it’s a good idea to update now, For more info click here.
Step Loop enables you to hold a single Pad, (or multiple Pads), to repeat the Step(s) of those Pads for as long you continue holding them. You can hold one Pad, or any com-bination of the Pads [1-16], to loop the corresponding Steps.
While you are holding Pads and looping Steps, the TR-8S will continue to play the cur-rent Pattern in the background. When you release the Pads, playback picks up from the current point in the Pattern’s sequence (including all currently selected Variations).
While Step Loop is active, the Pads [1-16] flash light blue as the sequence progresses, to help you keep track of where you are in the measure while you’re looping Steps. This is helpful for timing a Fill you’ve created using Step Loop in a musical way. For exam-ple, you may want to finish your Fill at the end of a measure, and go back to playing the current Pattern on the first beat of the next measure.
To use Step Loop:
- Press the Start/Stop Button to play your Pattern.
- Hold Shift and press the INST Play Button to engage Step Loop. The INST Play Button flashes green to indicate Step Loop is on.
- To loop a Step hold one of the Pads [1-16].
- To loop multiple Steps hold any combination of the Pads [1-16].
Article written by Alex Marlowe
 Alex Marlowe is a Composer/Producer, Musician and Consultant based in Melbourne, Australia. Alex has placed music in numerous movies and TV shows, and toured worldwide as a keyboardist with major artists. As a Teacher and Consultant, Alex has worked with platinum songwriters, music editors, producers and composers, and conducted courses in Music Production and Music Software, including at the Songwriting School of Los Angeles. You can find more info, and contact Alex at: www.logicproanswers.com
TR-8S Ultimate Guide
Related Product


