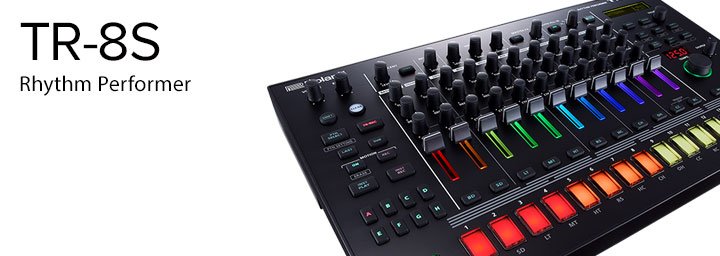
In this article we take a look at editing Kits and Instruments in the Roland TR-8S.
Let’s start with a basic “four on the floor” Pattern to use for experimenting with customizing a Kit and editing some Instruments.
First choose a Kit to modify, and copy it to the next available blank Kit number. For a refresher on how to do this, take a look at the article in this series called How to Choose and Copy Kits.

- Hold Shift and press the PTN Select Button to view the Pattern Edit Screen.
- Turn the Value Knob to select PTN SETTING: KIT Number and press Enter.
- Turn the Value Knob to select the Kit Number of the new Kit you copied earlier.
- Hold Shift and press the Kit Button to view the Kit Edit Screen.
- Turn the Value Knob to select Kit Level and press Enter.
- Turn the Value Knob to adjust the volume level and press Enter.
- Hold Shift and turn the Value Knob to select Kit:Name and press Enter.
- Turn the Value Knob to set the first letter of your Kit Name then press Utility.
- Turn the Value Knob to set the next letter of your Kit Name then press Utility.
- Repeat the previous step until you have the whole Kit Name then press Enter.
- Press the Start/Stop Button to start playing your Pattern.
- Press an Instrument Select Button to select an Instrument, to start try the BD Button to select the Bass Drum Instrument.
- Press the INST Button to view the Instrument Screen.
- Turn the Value Knob to change the Instrument assigned to the BD Track.
- Press the SD Button to to select the Snare Drum Instrument.
- Turn the Value Knob to change the Instrument assigned to the SD Track.
- Press the CH Button to to select the Closed High Hat Instrument.
- Turn the Value Knob to change the Instrument assigned to the CH Track.
To further customize your Kit, let’s change the tuning of some Instruments:
- Press the Start/Stop Button to start playing your Pattern.
- Press the BD Button to select the Bass Drum Instrument.
- Hold Shift and press the INST Button to view the Instrument Edit Screen.
- Turn the Value Knob to select Tune and press Enter.
- Turn the Value Knob to adjust the tuning of the Bass Drum.
- Press the SD Button to select the Snare Drum Instrument.
- Turn the Value Knob to adjust the tuning of the Snare Drum.
- Press the CH Button to select the Closed High Hat Instrument.
- Turn the Value Knob to adjust the tuning of the High Hat.
- Hold the Write Button and press the Kit Button.
- Turn the Value Knob to select the Kit Number where you’ll save your Kit.
- Press Enter, display shows Kit Write? To confirm press Enter again.
PRO TIP
Instruments that have a forward slash ( / ) in the Instrument Name have an alternate Instrument Tone that can be played on the same Instrument Track. To use Alternate Instruments:- Press the Start/Stop Button to start playing your Pattern.
- Press the RC Button to select the Ride Cymbal Instrument.
- Press the INST Button to view the Instrument Screen.
- Hold Shift and turn the Value Knob to select the PERC 1 Category.
- Turn the Value Knob to select an Instrument with a “/“ in the Name.
- Press the TR REC Button to enter Step Recording Mode.
- Press some of the Pads [1-16] to record the Instrument on some Steps.
- To assign the Alternate Instrument to selected pads, hold the RC Button and press the Pads on the Steps you want to change.
- To change a given Pad back to playing the main Instrument press the Pad once to clear the Alternate Instrument, and again to record the main Instrument.
Article written by Alex Marlowe
 Alex Marlowe is a Composer/Producer, Musician and Consultant based in Melbourne, Australia. Alex has placed music in numerous movies and TV shows, and toured worldwide as a keyboardist with major artists. As a Teacher and Consultant, Alex has worked with platinum songwriters, music editors, producers and composers, and conducted courses in Music Production and Music Software, including at the Songwriting School of Los Angeles. You can find more info, and contact Alex at: www.logicproanswers.com


