Eruption.
One of the world’s greatest guitar solos. From the debut album by Van Halen in 1978. This solo came bursting onto the scene with its innovative tone, two handed tapping and extreme tremolo bar use.
At the time, a young Eddie Van Halen was getting an incredible tone out of his 1968 Marshall “Plexi” Superlead Amplifier. The amount of gain coming from a supposedly “stock” Marshall didn’t make any sense to most guitarists.
Eddie had also bucked the status quo by gouging out a space for a humbucker pickup in the bridge position of his otherwise normal 3 single coil Strat body. By any measure, it’s an awesome tone and launched Edward Van Halen to the status of Guitar Legend.
 Eddie would have used his fledgling Frankenstrat, with a humbucker he had taken out of a Gibson and wax potted himself (ruining many pickups while perfecting this process). I used a Mexican Fender Strat in the video for this tone design segment that has a single coil in the bridge. In the GT-1, there is a setting for converting my single coil into a humbucker which I’ll go through in the Pickup Selection section of this article. I like to use very “plain” and familiar sounding guitars for tone design, because it’s easier for others to replicate and shows that this is possible even with basic/affordable gear (i.e. Mexican Strat + GT-1).
 This is definitely a bridge pickup tone (at the time it might have been the only pickup that was operational on Eddie’s guitar anyway). We can tell this by how bright the tone is. Because I only have a single coil in the bridge position, I’m going to use some of the magic in the GT-1’s Effects Section, to change the tone of the single coil into something more resembling a humbucker tone.
To do this, go to the FX-1/COMP section in the signal chain, select GUITAR SIMULATOR as the type of effect (this section contains many different effects), then select S-H (Single Coil – Humbucker). I’ve left the LOW setting at 0 and boosted the HIGH slightly to 2 and LEVEL at 50. If you have a guitar with a single coil in the bridge, you will notice a change to the tone as soon as you turn this effect on.
 Of course, this was Edward’s legendary 1968 Marshall Plexi Superlead 100 watt amplifier head into a 4 x 12″ speaker cabinet. The exact settings that he was running are unknown, but he was famous for cranking every knob to FULL!
When selecting an amp, there are some basic rules of thumb that will help:
 Before we get started on the effects section, I just want to explain what I mean by “Effects”. This can mean not only traditional effects that you would run in the main input or in the effects loop of your amplifier, (such as overdrive pedals, chorus, etc) but also any effects that were added later in the mixing process or “Post-Production” effects.
These can include delays for example, which are often added after the track has been recorded and would not have been heard by the guitarist at the time of recording. Other elements that I would count in the effects section are:

Recreating this tone
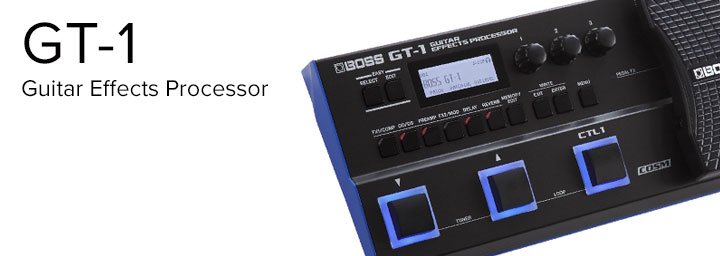
To recreate this tone, I’m going to use the BOSS GT-1, entry-level, multi-effects unit. While it’s great if you can afford all of Eddie’s original rig (or buy a small island for the same money), that still doesn’t help you simulate all of the other elements of the recording process, which I’ll explain in a moment. This is a fairly simple tone as far as the basic components of the recording go. A humbucker equipped guitar, a Marshall Plexi, a phaser effect that gives the tone some movement and a fairly large reverb effect. But as they say, “The Devil is in the Detail”. Getting the correct EQ settings for the amp and the correct space for the reverb makes this more of a challenge than it might first appear. Firstly, let’s break down the components of tone in a process I call, the 4 Elements of Tone.DOWNLOAD FREE PATCH NOW!
Visit guitarfxpatches.com and download free guitar tone from Eruption using Discount Code: GT1ERUPTION
Contributed by Josh Munday – Tone Designer for the Roland Australia Blog
1. The Guitar
 Eddie would have used his fledgling Frankenstrat, with a humbucker he had taken out of a Gibson and wax potted himself (ruining many pickups while perfecting this process). I used a Mexican Fender Strat in the video for this tone design segment that has a single coil in the bridge. In the GT-1, there is a setting for converting my single coil into a humbucker which I’ll go through in the Pickup Selection section of this article. I like to use very “plain” and familiar sounding guitars for tone design, because it’s easier for others to replicate and shows that this is possible even with basic/affordable gear (i.e. Mexican Strat + GT-1).
2. The Pickup Selection
 This is definitely a bridge pickup tone (at the time it might have been the only pickup that was operational on Eddie’s guitar anyway). We can tell this by how bright the tone is. Because I only have a single coil in the bridge position, I’m going to use some of the magic in the GT-1’s Effects Section, to change the tone of the single coil into something more resembling a humbucker tone.
To do this, go to the FX-1/COMP section in the signal chain, select GUITAR SIMULATOR as the type of effect (this section contains many different effects), then select S-H (Single Coil – Humbucker). I’ve left the LOW setting at 0 and boosted the HIGH slightly to 2 and LEVEL at 50. If you have a guitar with a single coil in the bridge, you will notice a change to the tone as soon as you turn this effect on.
3. The Amp
 Of course, this was Edward’s legendary 1968 Marshall Plexi Superlead 100 watt amplifier head into a 4 x 12″ speaker cabinet. The exact settings that he was running are unknown, but he was famous for cranking every knob to FULL!
When selecting an amp, there are some basic rules of thumb that will help:
ALWAYS START WITH EVERYTHING OFF!!!
I can’t stress this enough. Find the OFF button for everything in the signal chain, so all you can hear is your dry old guitar sound coming through. Remember any multi-FX/amp simulator like the BOSS GT-1 is just simulating a room full of gear, so think about it like that. You wouldn’t walk into a room full of amps and FX and start by turning everything ON would you? You would plug into an amp, get a good basic tone, then turn on any effects, one at a time and build up your sound…likewise with any multi-FX!- Set the EQ “flat” (i.e. all settings at the halfway point or 12 o’clock). This gives you a neutral starting point so that the EQ isn’t colouring the tone too much yet.
- Put the gain up to about a quarter to half a turn so you can hear the gain character.
Now onto the EQ settings.
I’ll often use quite extreme EQ settings, remember that we’re trying to reproduce the “recorded” version of this tone, which means that even though Eddie might not have been running these EQ settings, the mixing and mastering processes can change the tone. So we might need to make adjustments that seem a little “outside the box”. The settings I’ve chosen are:- BASS – 50
- MIDDLE – 98
- TREBLE – 100
- PRESENCE – 80
The setting I’ve selected in the MASTER SETTINGS section are:
- PATCH LEVEL – 128
- LOW GAIN – 1
- MID GAIN – 4
- MID FREQ – You can also select the frequency of the midrange in this part, so I set this to 1.00kHz to try and simulate the specific upper midrange frequency of the recording.
- Q MID – 1. The “Q” determines how much the frequencies surrounding the midrange frequency you’ve set will be affected. The lower the number, the more frequencies surrounding the MID FREQ setting will be affected when you boost or cut in the MID GAIN Setting.
- HIGH GAIN – 0
4. The Effects
 Before we get started on the effects section, I just want to explain what I mean by “Effects”. This can mean not only traditional effects that you would run in the main input or in the effects loop of your amplifier, (such as overdrive pedals, chorus, etc) but also any effects that were added later in the mixing process or “Post-Production” effects.
These can include delays for example, which are often added after the track has been recorded and would not have been heard by the guitarist at the time of recording. Other elements that I would count in the effects section are:
- EQ and Compression that were adjusted in the mixing stage.
- The microphone that is on the speaker cabinet. What did it sound like?
- Was there a second microphone in the room, away from the speaker cabinet?
- How far away from the speaker cabinet was the mic?
- How loud is that second mic in the mix?
- What did the room sound like from that room mic?
- etc…etc…etc….and on and on it goes.
- TYPE – PHASER
- 4STAGE
- RATE – 30 (pretty slow as that’s how he uses it)
- DEPTH – 39
- RESO – 12
- MANUAL – 55
- EFFECT LEVEL – 100
- TYPE – PLATE (this is a lush, spacious sounding reverb that’s perfect for this tone)
- TIME – 2.5s
- E.LEVEL – 87 (that’s a lot of reverb folks!)
- Over the page, you will see 2 more settings – LOW CUT and HIGH CUT. These 2 settings dictate how large a frequency band that you will hear the reverb in. Since this is an older recording, it’s more limited in the range that you hear in the recording. Often on guitar recordings, you don’t need a full range reverb, so I’ve cut everything from 160Hz down and 4kHz up.
- LOW CUT – 160Hz
- HIGH CUT – 4.00kHz
- PEDAL FX
- TYPE – PEDAL BEND
- PEDAL POSITION – 100
- PITCH – “-12”
- EFFECT LEVEL – 100
Related Articles
JIMI HENDRIX ‘VOODOO CHILD (SLIGHT RETURN)’ TONE DISSECTED THE POLICE ‘WALKING ON THE MOON’ TONE DISSECTED STEVIE RAY VAUGHAN ‘PRIDE AND JOY’ TONE DISSECTED THE BEATLES ‘REVOLUTION’ TONE DISSECTED FOUR ELEMENTS OF GUITAR TONE TONES IN TIME – 60S ROCK JIMI HENDRIX’S ‘FOXY LADY’ TONE DISSECTEDRelated Product


