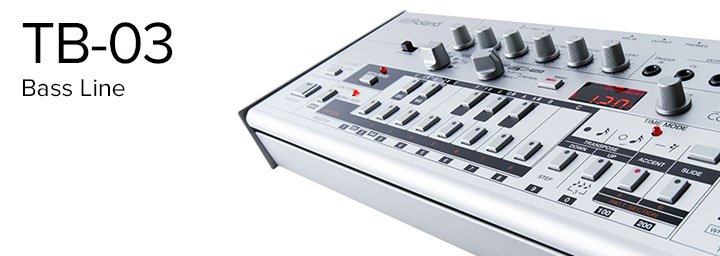
Introduced in 2016 to much excitement and acclaim, Roland’s Boutique modules have won hearts and minds. The Boutique series use Roland’s ACB technology to recreate classic, rare (and now, expensive!) Roland synthesizers and drum machines at an affordable price, in a small, modular format.
Following the success of the first round of Boutiques, namely the JP-08, JU-06 and JX-03, on 909 day in 2016, Roland released Boutique versions of the TR-909 drum machine, the TB-303 Bass Line Synth and the VP-330 Vocoder.
These modules are very powerful as standalone instruments, but there are even more features hidden under a few button combinations that will help you to make the most of your new Roland Boutiques.
In this article, we will focus on the latest in the Roland Boutique range, namely the TB-03, TR-09 and VP-03. If you are looking for information on the first Boutique releases, please see our previous article here.
Contributed by David Whitehead for Roland Corporation Australia
FEATURE #1: Powering Up
As they have been developed in conjunction with the popular AIRA range, all of the Boutique modules connect to Roland’s AIRA link ports, sending MIDI, audio and sync data down a single USB connection.
All of the Boutique modules have built-in sequencers and syncing is incredibly powerful when the modules are connected via an MX-1 or the new DJ-808.
When the USB connection is plugged in, the Boutique modules also take their power from this cable, saving your batteries. This is great if you are connecting to a computer, the DJ-808 or Port #3 on the MX-1. But what if you want to use an unpowered port (like Ports #1, #2 and #4 on the MX-1), or you want to use multiple Boutiques together?
On the MX-1, you will need to enable the battery power, while keeping the USB sending audio, MIDI and sync data.
To start up your Boutique, using the internal batteries and USB audio, hold down #9 on the TB-03, the TR-09, the VP-09 and/or the JX-03 while powering on.

FEATURE #2: Pattern Copy
The TB-303 and TR-909 were designed as backing and practice devices. They created bass and drum patterns for musicians to play over the top of and therefore, they are able to sequence entire songs by chaining patterns together.
Being faithful recreations of the originals, the TR-09 and TB-03 work the same way. The original TB-303 was not designed to be able to copy patterns. However, when users were creating tracks, they often found that they wanted to copy a pattern to another entry to make a slight change. They also wanted to do this without having to enter all the notes again. Some users managed to find a workaround in order to do this.
When creating the Boutiques, Roland engineers added a number of features and improvements that many users wished were in the original units!
To copy a pattern on the TB-03, first select PATTERN WRITE MODE and choose your source pattern. Then, hold down FUNCTION and press key F#. The LED will show COPY. Select the destination pattern and press WRITE/NEXT to confirm.
You can also copy patterns on the TR-09, including copying to another bank or group. First, choose your destination pattern by holding SHIFT and selecting what bank (I, II) you want to use. Select your PATTERN PLAY group (1 – 3) and which pattern (1 – 16). PATTERN PLAY should be flashing as you are in PATTERN WRITE mode. Then, continue to hold down SHIFT and press COPY (#11) followed by the BANK (I, II), PATTERN PLAY (1 – 3), the pattern source (1 – 16) and ENTER. Only release the SHIFT key once you have pressed ENTER.
FEATURE #3: Randomly Generating Patterns On The TB-03
The TB-303’s unique input mode often created some happy accidents and inspired creativity in a huge range of artists. This was taken to the next level with the RANDOM function on the AIRA TB-3. The TB-03 also allows you to create a random pattern, as a useful jumping off point to spark the creative process.
There are two ways to create random patterns on the TB-03. The first is totally random, including notes, SLIDES and ACCENTS. First, choose where it will be placed by entering PATTERN WRITE MODE and selecting a pattern. Then hold down FUNCTION and press G#.
The second random pattern keeps the notes you’ve already programmed, allowing you to stay in key. However, it also randomly generates SLIDES, ACCENTS and octave shifts.
Again, enter PATTERN WRITE MODE and select which pattern you want to modify. Then, hold down FUNCTION while pressing A#.
FEATURE #4: Hidden Instrument Controls On The TR-09
Not all of the parameters on the TR-09 have dedicated knobs. However, there is still the ability to change them in order to sculpt your sound. By holding down SHIFT and pressing EDIT, you can enter the Edit menu. This allows you to change the gain for each sound as well as the TUNE and DECAY for the sounds that do not have dedicated controls, such as the RIMSHOT, CLAP, HATS and CYMBALS.
With the 1.04 update to the TR-09, you can also PAN sounds to the left or the right to give your drum tracks a stereo spread. Hold down SHIFT and press EDIT to enter the menu. Then, turning the TEMPO knob to the right until it shows PAN, select a sound and turn the TEMPO knob left or right to pan it in that direction.
After any adjustments in the Edit menu, press ENTER or EDIT to save your changes.
FEATURE #5: Mute And Solo Settings On The TR-09
While not designed as a live performance instrument, the TR-909 has been used by many artists in performance to bring drum sounds in and out of a mix in real time. So it’s not surprising that one of the features that many artists wished the original had included is the ability to mute drum sounds without having to turn the volume knob.
The TR-09 allows you to mute or solo parts while playing with just a couple of buttons. Hold down SHIFT and INSTRUMENT SELECT and the LED display will show NUTE (Mute). While you are holding these keys down, press each of the sounds you want to mute. While muted, the step corresponding to that sound will blink. Press it again to unmute. If you want to SOLO a particular sound while you have the SHIFT and INSTRUMENT SELECT keys held down, turn the TEMPO knob. The display will not show SOLO. You can have multiple sounds soloed and they will flash to show that they have been selected.
FEATURE #6: Sampling On The VP-03
The VP-03 is not just a vocoder and string synth. It also has the ability to sample vocals into its sequencer. You can sample via the mic input, or from your computer if you’re plugged into a DAW.
Hold down which step in the sequencer you want to sample to. Then, hold down the PLAY/STOP button while speaking into the mic. Your voice will be recorded to that step and when you play back the sequence, it will sound through the vocoder. If you have the DIRECT MIC level up, it will also output your voice as a dry signal.
If using the VP-03 with a DAW, make sure you have all of the inputs enabled, with the audio sent to Channel 5. Channel 5 is the MIC input. Then, as before, you can hold the step you wish to sample to and PLAY/STOP to record.
FEATURE #7: Changing The Formant On The VP-03
The second ribbon controller on the VP-03 is standardly set to VIBRATO. However, it can also be used to adjust the formant of the vocoder, giving you more in-depth control over the vocoder sound.
Hold down the MEMORY button and select 10. You will see that buttons 1 and 2 are lit up. Generally, 1 will be flashing, showing that the ribbon control is set to VIBRATO. While continuing to hold the MEMORY button, select 2 and it will change to FORMANT control.
Bonus Tip: Roland Boutique MIDI CC And SYSEX Control
All of the Roland Boutique instruments can be controlled via MIDI. This means that you can change all parameters directly from your DAW, or from other instruments. This is great in a live setup, but also when producing as it enables you to automate parameter changes. MIDI implementation charts are available under each product from the Roland support page.
A number of users have also developed control apps and software for the Boutique range, check out more content from users at the Roland Clan Forum.
Related Articles
SEVEN HIDDEN FEATURES OF THE ROLAND BOUTIQUE SYNTHS
TR-09 VS. TR-8
TB-03 VS. TB-3
TOP 3 TIPS: A-01 CONTROLLER+GENERATOR


