For the solo electronic artist, the most obvious option when it comes to performing live has long been the DJ set. These days, using a laptop running any DJ application, mixing your own tracks with those of other acts is a piece of cake.
Making the transition from the warm, cosy confines of the home studio to the intimidating, unpredictable and risky public exposure of the live arena can be a real challenge.
However, for those prepared to put in the planning and effort, taking electronic music of any kind (dance, urban, arty, Berlin school, improv – you name it) to the stage can not only have a hugely promotional effect on their production career (and potentially their bank balance), but it is also immensely fun and incredibly satisfying.
Contributed by Roland UK
Oh, sure, you could just hook everything up to a sequencer and press ‘play’, but that – let’s be very clear – amounts to nothing more than posing.
The traditional band line-up of guitars, bass, drums, vocals and perhaps a keyboard is pretty much foolproof in terms of setup. The drummer erects their kit and points a few microphones at it, while everyone else plugs into an amp, possibly via a pedal board or small effects rack, and also runs up a mic or two. Easy.
The electronic musician, meanwhile, will be using multiple analogue and digital instruments and effects, a laptop running a DAW of some sort and their own mixer, quite separate to the one operated by the front-of-house engineer. Apart from the sheer amount of stuff involved, getting it all working together 100% reliably is a major task in itself.
The biggest advantage the ‘regular’ band has, though, is that each member only has to take care of one channel of the mix, so to speak. The drummer supplies the beat, the guitarist the riffs, etc. And, of course, the visual spectacle of a stage full of musos wigging out in sync is always a winner.
The electronic artist, on the other hand has to do it all him or herself – much of it in real time. Oh, sure, you could just hook everything up to a sequencer and press ‘play’, but that – let’s be very clear – amounts to nothing more than posing, and the savvy modern crowd will see through it in minutes.
No, for true artistic integrity and maximum creative impact you’ll be pummelling drum pads, playing synths, sampling sounds on the fly, flinging effects around and mixing as you go. And you really will need to keep moving, as spending more than a few seconds staring at that laptop screen will give the impression you’re just checking your Facebook feed.
So, now that we know what the hurdles are, how do we go about clearing them? It’s all about preparation…
You’re going to need a DAW
Obviously, you’re not going to be able to literally play every element of any multitrack production live. You’ve only got one pair of hands, after all. So there will be a lot of sequencing involved, and this – along with general signal routing and other ‘central hub’ operations – needs to be handled by a software DAW, just as it is in your studio. However, by using a performance-orientated, non-linear DAW such as Ableton Live, that sequencing can still involve a great deal of genuine interaction.
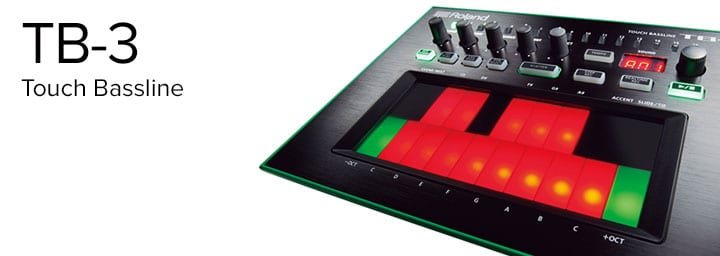
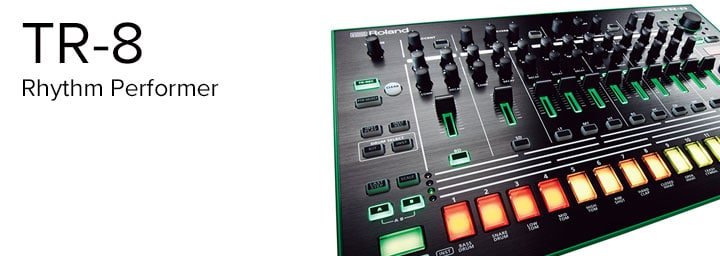
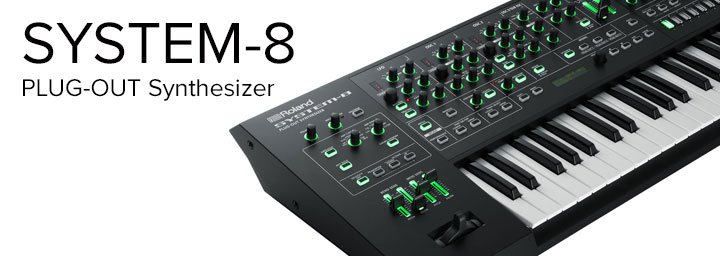
Live’s Session View, and its equivalent in certain alternatives, enables the freeform triggering of tempo-synced (ie, always in time with each other) audio and MIDI clips arranged in vertical stacks. So, to give a very simple example, you could have a set of 20 MIDI beat clips routed to your TR-8 on one track, 15 MIDI basslines triggering your TB-3 on another, a heap of sampled effects on a third, and a live channel routing your master keyboard to your SYSTEM-8 synth.
The clips can be launched in any combination, with newly launched ones waiting until the start of the next bar to start playing, while you accompany them live on the SYSTEM-8.
Even if you’re already settled on a studio DAW, we still recommend switching to Live for gigging purposes, as its non-linear approach is designed with live performance in mind. And exporting MIDI and audio clips to it from Logic, Cubase, Pro Tools, etc, is easy to do…
Condense your rig
While the DAW and its host laptop are easy enough to manage, taking the rest of your studio on the road is a whole other ball game. Realistically – and depending on the size of your setup – you’re probably not going to want to take all of it out with you, so play around with the positioning of devices on whatever (sturdy!) live desk you intend to use and boil them down to the most important, frequently employed ones.
A rack can be useful for stacking modules, but don’t let it become too much of a tower – assume that the smallest stage you’ll potentially be occupying will be very small indeed.
For those synths that are only called on occasionally, and thus would be better left at home than taking up valuable on-stage desk space, sampling is the solution. You can either record the actual parts they play as loops, or multisample them note by note into a soft sampler such as Live’s Simpler, so that you can still play the parts yourself via your master keyboard.
Speaking of which, while a master MIDI controller keyboard with integrated drum pads is a must for playing module-format synths and software instruments, and triggering DAW-hosted samples (percussion, FX, etc), be sure to play your keyboard-equipped instruments from their own ’boards. Not only does it look better if you move from synth to synth throughout the set, but it also ensures you won’t ever accidentally select the wrong one.
When selecting viable tracks for an electronic live set, the same rules apply as with any other kind of music: think of the whole thing in terms of highs and lows, light and shade… and how easy they’ll actually be to realise in front of a room full of (hopefully) paying punters.
On the effects front, it definitely pays to keep things simple. Ideally, you just want one or two multi-effects modules on auxiliary sends from the mixer, perhaps with XY pads for intuitive hands-on control. Incorporate your synths’ built-in effects into their presets as much as possible, for consistency in terms of sound design between the produced tracks and their live versions, and to free up the aforementioned modules for spot FX, flamboyant dub-style feedback delay adventures and so forth.
Finally, mixing and cue monitoring. While you could run all your synths and effects into an audio interface connected to your laptop for mixing within the DAW, we certainly wouldn’t recommend it.
The more stuff you do with your computer, the more likely it is to crash. So, if you don’t have one already, invest in a small format mixer with just enough inputs to accept everything in your rig, and a couple of auxiliary busses for effects processing.
The AIRA MX-1 is ideal, particularly if you’re using other AIRA devices alongside it, as it not only connects to them via USB but also works as a DAW controller, and features onboard sequenced effects, cue monitoring (for auditioning sounds through headphones before routing them to the main mix) and more.
Make sure the music actually works live
When selecting viable tracks for an electronic live set, the same rules apply as with any other kind of music: think of the whole thing in terms of highs and lows, light and shade… and how easy they’ll actually be to realise in front of a room full of (hopefully) paying punters. Even though you could include your most ambitious, epic, dense pieces – since there’s no limit to how much can be sequenced – remember that you need to connect with the audience, which means they need to believe that you’re in control at all times, not that the laptop.
So, choose tracks based on how much hands-on interaction you can have with them. You should be doing something all the time, whether it’s triggering drums, playing a bassline, manipulating a filter or just firing off sound effects; and the vast majority of it needs to be away from the laptop.
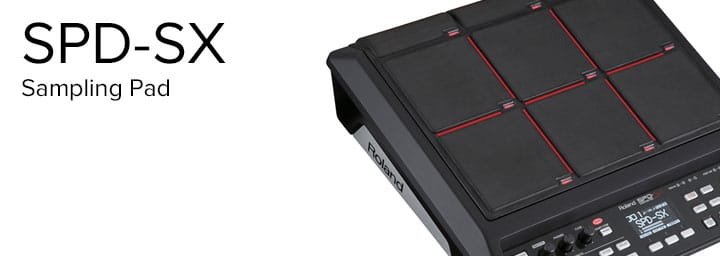
Check out the amazing Jack Garrett for a masterclass in playing drum, keys, guitar, bass and vocals – live! (with a bit of help from his Roland SPD-SX sampling pad).
Striking the right balance between time spent launching clips and mixing (not fun to watch but essential for recreating studio productions live) and time spent playing keyboards or drum pads (fun to watch but, really, not always contributing a great deal to the track at any given moment) is crucial. In summary, while the choice of music is absolutely central, it has to be made with the performance angle in mind.
It’s well worth developing a few tracks specifically for live play, too. Real-time looping is the way to go with this, recording MIDI clips and sampling live audio input on the fly into a looper pedal (like the Boss RC-1 LoopStation) or software plugin (like Live’s Looper, for example) to build up pre-composed tracks, layer by layer. Live looping’s a big thing with buskers right now, so head into your town centre on a Saturday afternoon to see how its done.
Of course, you could also throw caution to the wind and take the fully improvisational route! Again, the looper pedal or plugin is your friend here, and as long as you don’t over-reach your own instrumental abilities, a successful live jam can be a real crowd-pleaser.
Maybe throw one in around the middle of the set, so that if it all goes wrong – or just ends up being a bit dull – you can pick the pace up and restore the audience’s faith with plenty of composed material still to go.
In case of emergencies
Last and hopefully least, at every gig, keep a media playback device (your phone, say) plumbed into a channel on the mixer with a crowd-lifting track ready to drop instantly should the unthinkable happen and your laptop crashes. As long as you keep your software setup lean and simple, and have lots of run-throughs prior to the big night to make sure it’s totally reliable, this shouldn’t happen – but you know what they say about failing to prepare…
Related Articles
TR-8 AND EFFECTS – PART 1: ONBOARD EFFECTS
TR-8 AND EFFECTS – PART 2: PEDALS
TR-8 AND EFFECTS – PART 3: MODULAR EFFECTS
TIPS AND TRICKS FOR ADVANCED LOOPERS
LOOK MA, NO FEET! HOW TO GET HANDS ON WITH YOUR LOOPER
TYPICAL DRUM PLAYING TECHNIQUES WITH V-DRUMS
CLICKS & GIGGLES: HOW THE METRONOME CAN BE YOUR BEST FRIEND
PERFORMING LIVE WITH V-DRUMS AND ELECTRONIC PERCUSSION
Related Products