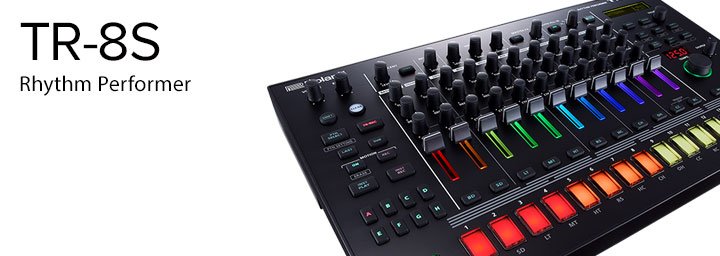
The LFO is an often overlooked feature of the Roland TR-8S that has a great deal of power and flexibility to modify the sound of the Instrument in real-time.
Every Kit can have its own LFO Waveform, Tempo Sync, and Rate settings. Every Instrument in every Kit can have the LFO assigned to modify a different Parameter, with a different LFO Depth Setting!
LFO Depth on every Instrument in a Kit can be adjusted in real-time, and automated using the CTRL Knobs on each Instrument Track!
(I’m guessing if you’re reading this, you may be excited about the possibilities as well!)
Let’s do a couple of experiments to try out the LFO features and automate some CTRL Knobs.
It’s a good idea to start with a blank Pattern and Kit and create a simple groove to use for this. For a refresher on how to create a Pattern, take a quick look at the article in this series called Creating a Pattern in TR-REC Mode.
For now, let’s set the LFO Waveform to Sine Wave, and Tempo Sync to On. We’ll set the Rate to 8 Step, so the LFO is running at a speed of Half Notes in sync with the Pattern Tempo.
Setting LFO Parameters on a Kit
- Hold Shift and Press Kit to view the Kit Edit Screen.
- Hold Shift and turn the Value Knob to select LFO Waveform and press Enter.
- Turn the Value Knob to set the LFO Waveform and press Enter.
- Turn the Value Knob to select LFO Tempo Sync and press Enter.
- Turn the Value Knob to set Tempo Sync to On and press Enter.
- Turn the Value Knob to select LFO Rate and press Enter.
- Turn the Value Knob to set the LFO Rate.
For this experiment, let’s assign the CC Instrument to “Yigh Bass”, and the RC Instrument to “SoftPad minor7th”. For a refresher on how to assign Instruments in a Kit, take a quick look at the article in this series called Modifying Drum Kits and Instruments.
Let’s set the CC Instrument LFO to Coarse, LFO Depth to 0. Set the RC Instrument LFO to InstFX, and LFO Depth to 0.
Assigning LFO settings for each Instrument
- Press the Instrument Select Button of the first Instrument for which you want to set LFO.
- Hold Shift and Press INST to view the INST Edit Screen.
- Hold Shift and turn the Value Knob to select LFO and press Enter.
- Turn the Value Knob to set the Parameter the LFO will modify and press Enter.
- Turn the Value Knob to select LFO Depth and press Enter.
- Turn the Value Knob to set the LFO Depth and press Enter.
- Press the Instrument Select Button of each additional Instrument for which you want to set LFO, and repeat steps 3-6 for each Instrument.
- Press the RC Instrument Select Button.
- Hold Shift and Press INST to view the INST Edit Screen.
- Hold Shift and turn the Value Knob to select FX Type and press Enter.
- Turn the Value Knob to set the FX Type to LPF/HPF.
- Press the TR-REC Button to enter Step Recording Mode.
- Press the CC Instrument Select Button and press Pad [1].
- Press the RC Instrument Select Button and press Pad [7].
Of course you can create any Pattern you like, but it’s a good idea to keep it simple for now so you can clearly hear the effect of the LFO on the Instruments.
All we need to do at this stage is assign the CC and RC CTRL Knobs to LFO Depth, so they can be used to adjust and automate the LFO:
- Hold the CTRL Select Button and turn the CTRL Knob of the CC Track to assign it to LFO Depth.
- Continue holding the CTRL Select Button and turn the CTRL Knob of the RC Track to assign it to LFO Depth.
Press the Start/Stop Button to play your Pattern and turn the CC and RC CTRL Knobs to apply the LFO to those Instruments.
To automate those CTRL Knobs, press the Motion REC Button and turn the CTRL Knob you’d like to automate, then press Motion REC again to stop recording. To playback your recorded Motion Data, press the Motion On Button to turn it on.
PRO TIP
The TR-8S has an AIRA Microsite that contains a series of free Patterns and Kits in a broad range of styles, available for you to download and try out for yourself, as well as updates and information related to the TR-8S. You can find the site here: https://aira.roland.com/products/tr-8s/Article written by Alex Marlowe
 Alex Marlowe is a Composer/Producer, Musician and Consultant based in Melbourne, Australia. Alex has placed music in numerous movies and TV shows, and toured worldwide as a keyboardist with major artists. As a Teacher and Consultant, Alex has worked with platinum songwriters, music editors, producers and composers, and conducted courses in Music Production and Music Software, including at the Songwriting School of Los Angeles. You can find more info, and contact Alex at: www.logicproanswers.com


