Delay is the effect commonly used in Audio Production that takes a sound and repeats it after a specified amount of time. Delay times can be either in milliseconds, or musical values like 1/8th notes or 1/6th notes. Delay effects are often synchronized to the tempo of the song or track to which the Delay is applied.
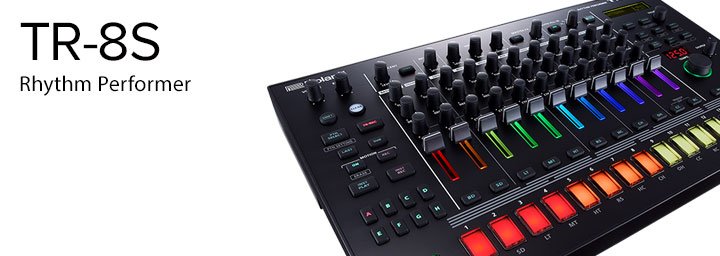
The TR-8S provides a variety of ways of applying Delay to Kits and Individual Instruments, and varying Delay during a performance. Here are some methods for doing just that.
- Hold Shift and press the Kit Button to view the Kit Edit screen.
- Turn the Value Knob to select Delay Type and press Enter.
- Turn the Value Knob to select your preferred Delay Type and press Enter.
- Turn the Value Knob to select Delay Level and press Enter.
- Turn the Value Knob to set the Delay Level and press Enter.
- Repeat steps 4 and 5 for the other Delay Parameters as desired.
Delay Level must be set to a value other than zero in order for Delay effects to be heard. Tempo Sync must be set to “On” in order for delays to be synchronized to the Pattern Tempo.
Setting Delay for Individual Instruments
- Press the Instrument Select Button [BD-RC] of the first Instrument for which you want to adjust the Delay.
- Hold Shift and press the INST Button to view the Instrument Edit screen.
- Turn the Value Knob to select Delay Send and press Enter.
- Turn the Value Knob to set the Delay Send Amount.
- Press the Instrument Select Button [BD-RC] of the next Instrument for which you want to adjust the Delay.
- Turn the Value Knob to set the Delay Send Amount.
- Repeat steps 5 and 6 as desired.
- Hold the Write Button and press the Kit Button.
- Turn the Value Knob to select the destination Kit Number in which to save.
- Press Enter, the Display shows ‘Kit Write?’ Press Enter again to confirm.
Adjusting Delay in Real Time
- Press the Start/Stop Button to start playing your Pattern.
- Hold the Instrument Select Button of the Instrument for which you want to adjust Delay and turn the Delay Level Knob.
- Repeat step 2 with all Instruments for which you want to adjust Delay.
PRO TIP
Some interesting effects can result from changing the Delay Time parameter as a sound is playing through the Delay. This method works especially well with higher Feedback Values. Try turning the Delay Time Knob from left to right, going from a shorter to a longer Delay Time, as a sound plays through the Delay, this can sometimes result in a “Turntable Stop” effect.Article written by Alex Marlowe
 Alex Marlowe is a Composer/Producer, Musician and Consultant based in Melbourne, Australia. Alex has placed music in numerous movies and TV shows, and toured worldwide as a keyboardist with major artists. As a Teacher and Consultant, Alex has worked with platinum songwriters, music editors, producers and composers, and conducted courses in Music Production and Music Software, including at the Songwriting School of Los Angeles. You can find more info, and contact Alex at: www.logicproanswers.com


