
In our earlier Roland TM-2 article we covered the basics of the TM-2 and triggering an acoustic kit. Let’s continue to get the kit triggered up.
Most importantly, In the first part, we learnt how the TM-2 could be used for both acoustic and electronic drum kits now let’s look at triggering an acoustic drum kit.
For acoustic kits in particular, drummers are often required to setup in a space too small.
This is especially true with smaller gigs where it’s difficult to warrant a full microphone setup.
Unfortunately, this often causes a disconnect between the drum kit and the amplified instruments from the same band (such as vocals, guitars and keyboards). Hybrid kit setups can often be the best solution and it’s a simple case of triggering an acoustic drum kit.
Learn more about Roland’s hybrid drum products here
Typically, this results in the drum kit’s sound coming directly from the stage.
There is then a disconnect as all other amplified sounds come through speakers (often off-stage and run through a public address (PA) system). This also means the drum kit’s kick and snare can’t achieve enough punch. Subsequently they get lost in the other instrument sounds. Apart from the obvious sound issues this causes, the drum kit’s level can’t be controlled by the front of house engineer. Nobody wants that.
As an end result there are too many elements that are outside of any one person’s control (especially the drummer). This can be resolved by utilising the TM-2 and some smart trigger usage. The result will be a drum sound with some real dynamism. Let’s look at how you can do this yourself and trigger your acoustic kit .
Contributed by Michael Schack and Simon Ayton
Acoustic kit triggering basics
Trigger placement
Thanks to recent advancements in trigger design, placement is no longer as critical as it has been in the past when triggering your acoustic kit.
The RT-30 series triggers no longer require and mechanical adjustment.
The unique anti-false trigger design of the RT-30K and RT-30HR also means that triggers can be placed anywhere on the drum without false triggering.
One basic rule of thumb remains for all drummers! Don’t put the triggers where they’re likely to be hit.
By following the setup guide that comes with each RT series trigger you should find yourself easily optimising the correct contact required with the drum head.
That should be as tricky as it gets. You can tweak settings like threshold, sensitivity, x-talk and retrigger cancel if you want to experiment with using a mic as a trigger. However, for the most part all of this hard work has been done for you. That’s one of the biggest advantages of the RT series triggers. Most people are going to choose the trigger type in the module, place the trigger and then simply play.

Muffling
Excessive ringing and vibration of the drum reduces how sensitive you can make the triggers when triggering your acoustic kit.
You don’t have to resort to wads of gaffer tape! You can use some moon gel, a basic donut ring dampener or a small piece of tape on the edge of the drum head just to control any dissonant overtones. This is good practice in any case if your kit is going to be miked up, The front of house engineer won’t have to spend time setting up audio noise gates. They’ll also find it easier to EQ the kit to get a fatter sound. This is important as we need happy engineers.
With those basics covered, let’s look at how we setup a kit containing a kick, snare and two toms. If your kit requires more, simply chain another TM-2 via MIDI for another four trigger inputs.
Acoustic trigger setup
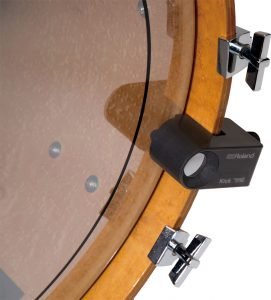
Step 1: Attach the triggers
Place triggers out of the way and so they cables can be hidden out of the way where possible
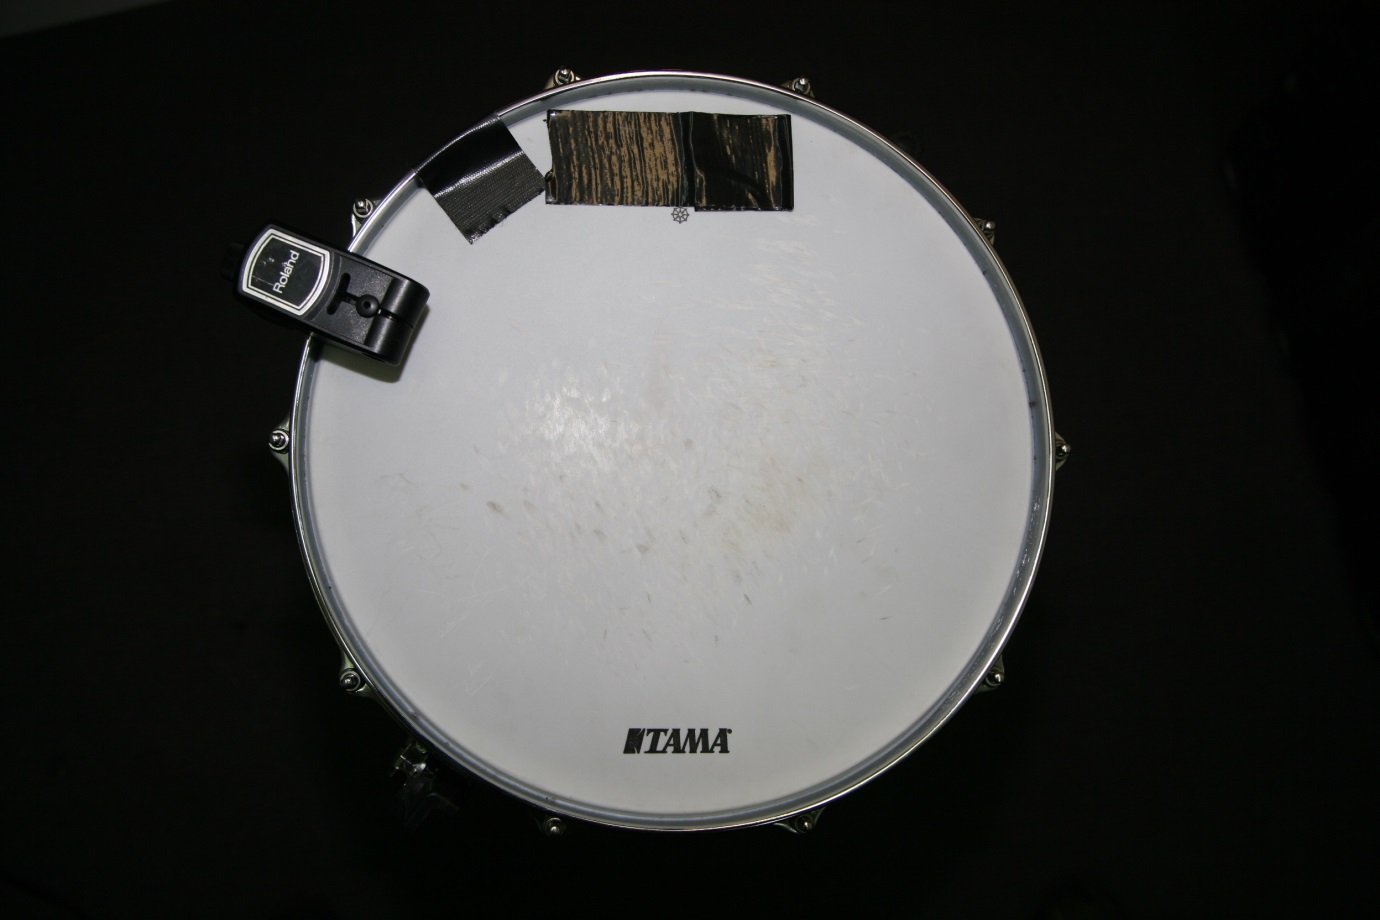
Above: Snare drum trigger placement (10-12 o’clock)
Step 2: Connect the triggers
With the kick and snare triggers in place, connect each trigger to it’s own input using the supplied TRS/Stereo cable.
Both the RT-30HR and RT-30K require the TRS cable to access Head&rim on the snare and anti false-triggering on the kick.
In the case where you want to connect four triggers to the TM-2, use an insert cable for each input to split the trigger zones.
Connect the stereo ends to the TM-2 and the mono ends to each of the RT triggers. Kick and snare triggers show.

Above: TM-2 connections to triggers
Step 3: Setup the triggers
In the TM-2, access the trigger settings setup screen and choose trigger inputs 1 and 2 as PADX2. This sets the inputs up so that they split to work with two triggers for a total of four separate channels.

Above: TM-2 trigger settings setup screen
Step 4: Choose the trigger type
While still in the trigger settings, scroll through to the next screen and make sure you select the correct trigger type.
To do this, simply tap the relevant drum trigger or press the 1 or 2 trigger pads and and choose its matching name in the settings (for example RT-30HR for snare, RT-30K for kick and RT-30H for toms.
Step 5: Connect to the sound system
The left and right master outs of the TM-2 can now be connected to direct inject (D.I) units to go to the front of house engineer. The
Roland TM-2 outputs are line level un-balanced so the D.I units convert the signal to balanced for long, noise-free cable runs over XLR microphone cables.
Make sure you get two as you’ll need them for the stereo left and right channels. Unless of course your entire audience is deaf in the same ear!
Setup complete. Now what?
Step 6: PLAY!
 Congratulations! You’ve successfully triggered your acoustic kit and reinforced your drums allowing you to create sounds that compliment—not necessarily replace—your drum sound. Having said that, if you do want to totally replace the drum sound you can!
As was mentioned at the beginning of this article, the main aim is often to fill the gaps in the acoustic kit sound when competing with amplified instruments in certain environments.
Perhaps you’d like to use a brass piccolo snare on stage because it looks impressive and has a great loud crack to it.
Chances are in the non-miked environment you’ll lose some power in the bottom end. However, if you applied a trigger to the snare and connected that to a patch on the TM-2, you’ll have enough thump and punch to make this piece of kit sound as cool as it looks.
The Final Touches when triggering and acoustic kit
Remember how you organised for your front of house engineer to set you up with a stereo connection earlier?
Well by panning the kick to the left (value L15) and the snare to the right (value R15) they’ll come up on separate channels of the mixing desk allowing them separate controls.
The engineer is going to love you and your sound will thank you (by generating audience admiration).
The engineer is going to receive praise for which you’ll earn the much sought after engineer audio admiration (EAA).
Before you know it, the drum setup will be taking priority during gig setups and the engineer will be sending you virtual high fives as you continue to build studio quality sounds on the live stage when triggering your acoustic kit (no matter the size or location).
If any of this appeals to you, feel free to try some of the patches listed below and enjoy your new-found stardom when triggering your acoustic kit.
Go-to Roland TM-2 Patches to try
- Fatten those drums – #20
- Sustain those drums – #11
- Blast Super Attack – #22
- Phase out – #08
- Electro-fy those drums – #14
Get the free Hybrid Drumming Guide
Related Articles
Michael Schack talks Hybrid: Electronic Kit Setup