Recording Roland TD-30 V-Drums is very straight forward.
In contrast, acoustic drum recording is so complex, it’s considered by many to be an art form.
Finding a balance between equipment, knowledge, patience and money that works for your project is a skill that comes with experience and time.
Being a collection of various percussion instruments, a drum kit requires different types of microphones and positioning to make one cohesive drum kit sound.
Capturing a great performance is even more difficult when you’re also the one recording the drums, but there are ways to minimize your workflow and maximize your performance!
Contributed by Simon Ayton for Roland Corporation Australia
ENTER ELECTRONIC DRUMS…
Recording electronic drums is simple when compared to recording acoustic drums.
See the V-Drums range overview
You can record V-Drums almost anywhere.
V-Drums fit quickly into a recording space and with unlimited sound and performance possibilities, your options for creativity are increased dramatically.
When recording V-Drums, you can forget about tuning, muffling, microphone positioning and preamplifiers.
Forget specially designed studios, noise problems and studio hire fees too.
JUST PLAY
Relax, focus on the music and just play.
V-Drums are ideal for recording yourself, because their simplicity means you can focus on your actual performance.
The aim of this recording masterclass article series is to break down and simplify the process of recording electronic drums.
You will achieve great results with just basic connections and knowledge.
RECORDING THE TD-30 SERIES V-DRUMS
Roland’s TD-30 V-Drums kit is a joy to record, with all options open to you.
For connection and recording options, there are ten audio outputs along with conventional MIDI IN/OUT and USB Audio/MIDI. But which recording method should you use?
Let’s jump right into combined MIDI and audio recording with the TD-30, as it offers the most flexibility and ultimately, the best sound for your final mix.
RECORDING MIDI AND AUDIO
There are essentially two recording methods to use with your TD-30 kit.
Method 1: Combined Audio and MIDI
Using the USB MIDI/Audio port alone, you could record both a track of MIDI and a track of stereo audio at the same time.
Here’s how two tracks of MIDI and audio will typically look in a sequencing program.
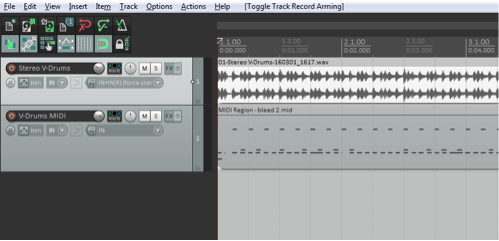
This first method is useful when capturing a live performance with a band, to give you instant audio playback when the module is no longer available and it also offers editing options later, using the MIDI data and any other sound source.
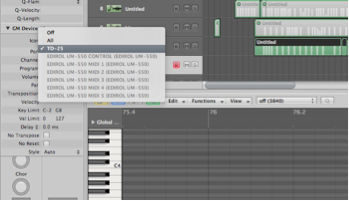
Method 2: Recording MIDI
Many musicians find this second method, of capturing a MIDI performance and then adding audio later, to be an excellent procedure for studio work.
It offers both creativity in the recording process and the best control over the final sound mix.
Here are the typical steps for the second method:
- Record your MIDI performance into your sequencing program.

- Playback and edit the note performance.
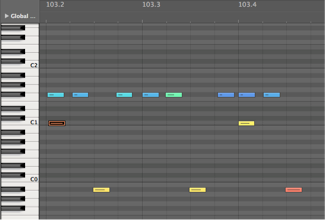
- Choose and tweak your ideal sounds either from your sound module or plug-in sound library.
- Record the resultant external audio into one or more tracks.
- Utilize any audio effects such as EQ, compression or reverb.
- Mix the audio as a final stereo file for release.
The big advantage of working this way is that you can leave sound choices until later and just concentrate on the performance.
KEY POINTS
-
- Alter each note of your performance if you make a mistake, or remove notes completely if you overplay. Quantize MIDI to correct timing issues. You can even change a straight feel to a swung feel for a completely new performance.
- MIDI recording uses very little space compared to audio, so you can continue recording as many takes as you like without using vital hard drive space.
- Leave sound choices until the final mix, once you have recorded other instrument parts to make sure that they all blend together well.
- Alternate versions of the mix can be achieved simply by changing the drum sounds for each mix. You can decide later which to use, or even cut between them. For example, you may want to choose different kit sounds for the verses and choruses!
- Everything is possible by recording MIDI first and audio last.
RECORDING MULTI-CHANNEL AUDIO
Once you’ve edited your MIDI performance and chosen your sounds, it’s time to record the performance as audio back in to your software to be combined with other audio tracks. For this, you will need to use an audio interface or the one built in to the TD-30.
Recording the audio signal can be achieved two channels at a time into an audio interface via the analog master outputs.
To record digitally, use the coaxial SP/DIF digital output or direct from the TD-30 digitally via the built-in USB port.
Using just a stereo track at a time, you can capture the TD-30 with multiple passes into separate tracks for more mixing control; simply turn down the sounds you don’t want to record.
This is the way to go if you want to edit, EQ or compress the sounds in the mix or output the recorded tracks into separate channels of an external mixer.
You could also record multi-channel drums onto separate tracks all at once by using a separate, multi-channel audio interface such as the OCTA-CAPTURE.

There are ten analog audio outputs on the TD-30, so the Octa-Capture (UA-1010) would be an ideal choice for recording TD-30 drum sounds onto individual tracks in one pass.

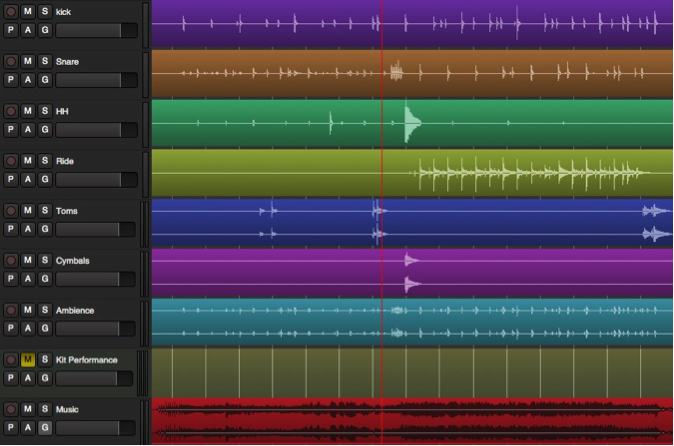
The TD-30 is already configured for multi-channel audio as follows:
Track1 = mono = Kick Direct out 1
Track2 = mono = Snare Direct out 2
Track3 = mono = HH Direct out 3
Track4 = mono = Ride Direct out 4
Track5 = stereo = Toms Left and Right Direct outs 5&6
Track6 = stereo = Cymbals Left and Right Direct outs 7&8
Track7 = stereo = Ambience/Reverb/FX SPD/DIF outs Left and Right
Now you can see the possibilities when recording with the TD-30.
Start with just the USB port and a single lead to record your MIDI and audio, or take it to the next level with multi-track recording. Either way, recording professional sounding drums has never been easier than with the Roland TD-30.
Related Articles
HOW TO ADD SAMPLES TO YOUR V-DRUMS
TYPICAL DRUM PLAYING TECHNIQUES WITH V-DRUMS
Related Products