The Essential Quick Start Guide to the Roland TD-50 V-Drums will have you up and playing in no time!
So you’ve splashed out on the TD-50 kit… CONGRATULATIONS!
We know that you’re busting to jump on and start playing so we’ve put together a drummer’s essential quick start guide to the Roland TD-50 V-Drums.
Here is a list of essential must do’s when setting up Roland TD-50 series V-Drums to give you the best possible experience.
In this setting up V-Drums guide, we will cover:
- Setting up the V-Drums rack for left and right handers
- Pad Placement and Trigger Settings
- Hi-Hat Adjustment
- Roland TD-50 Module Settings
Contributed by Simon Ayton for the Roland Australia Blog
1. Setting up the Roland TD-50 V-Drums Rack – Left or Right handed?
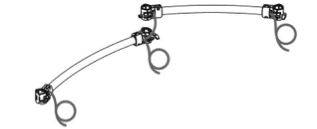
Setting up the V-Drums rack for Right-handers:
First, lay the two curved pieces down on the floor, with the straight ended jacks labelled kick, toms etc exiting to the far left corner. That’s where the module will go.
The third curved pole to the far right should have no cables running through it.
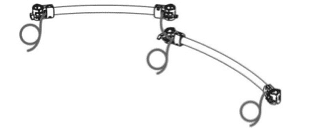
V-Drums For Left-Handers:
Reverse this so that straight ended jacks exit the far right corner of the rack for the left handed set.
TD-50K Setup Video
https://www.youtube.com/watch?v=hTjHA6oGPhQ
TD-50KV Setup Video
https://www.youtube.com/watch?v=Qq3HqBnE6pk
2. Set up the kick
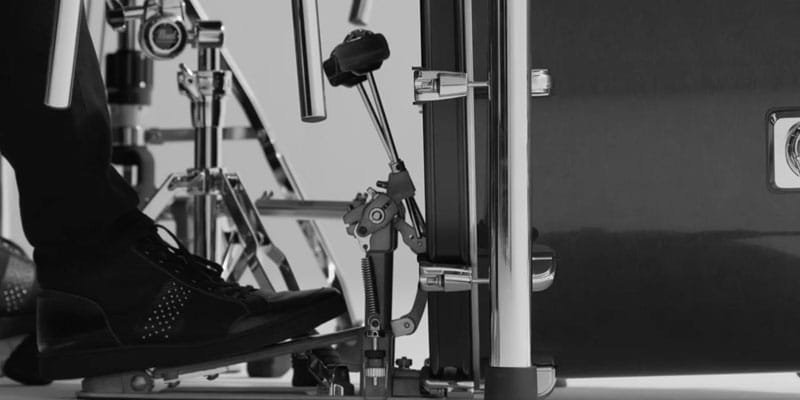
Attach the KD-A22 to your own 22” kick following the supplied steps carefully. Alternatively, set up the supplied KD-220 or KD-120 kick trigger.
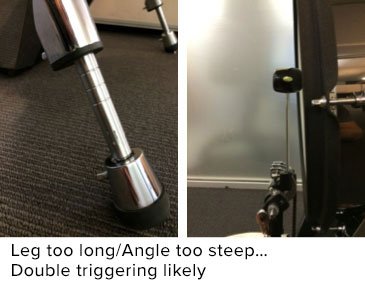
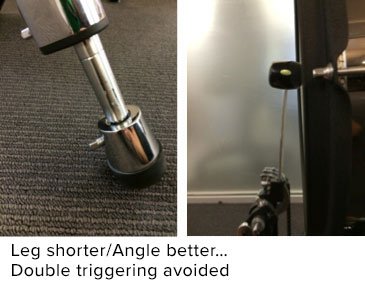
With the KD-140 trigger, the leg length determines the angle at which the kick beater will make contact with the head.
To avoid excess bounces and double hits, adjust the angle of the kick head surface back from 12 o’clock when viewed side-on, so that the swinging beater doesn’t hit the head twice. This is done by reducing the length of the legs.
With the KD-120 kick trigger, simply loosen the clamps holding the pad and rotate the trigger pad on the shaft to adjust the optimum angle.

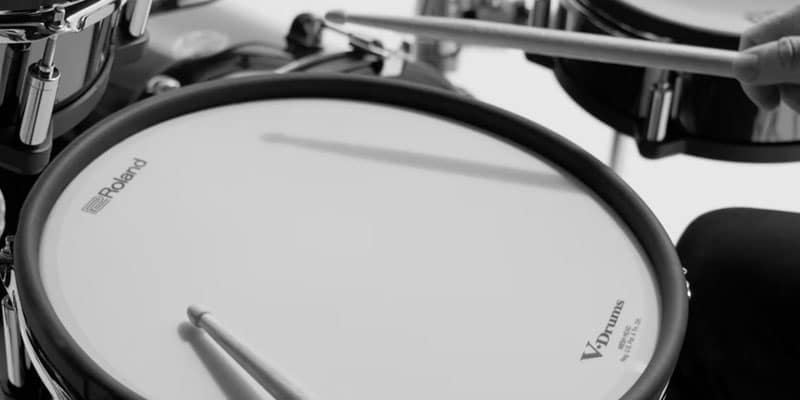
3. Connect the toms and snare
You can set up the toms as per the pictures, with one up (T1) and two down (T3, T4) or two up (T1, T2) and one down (T3) for a conventional looking five-piece kit.
For this second option, insert tom 2’s rod holder directly into the rack pole and move the ride to the first floor tom’s clamp position.
Place the snare on a conventional snare stand. Connect the supplied USB lead to the snare and from the snare, into any of the digital USB connections of the TD-50 module.
Clip down the cable lock to ensure a reliable connection whilst playing

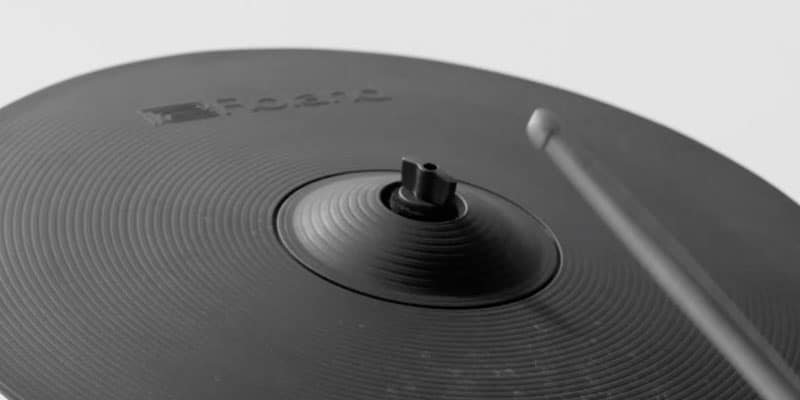
4. Mount and connect the cymbals.
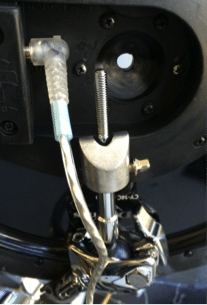
The clamping screws of the supplied V-stoppers need to be loosened before tightening to the cymbal arm.
Cymbals mount directly onto the V-stoppers, which are designed to stop cymbals from spinning. The felt then goes on, followed by the wing-nut.
Attach the supplied USB cable between the CY-18DR ride and any of the module’s digital USB inputs. Ensure the USB connector clip is fastened to keep the USB connector secure during performance.

5. Mount and connect the module
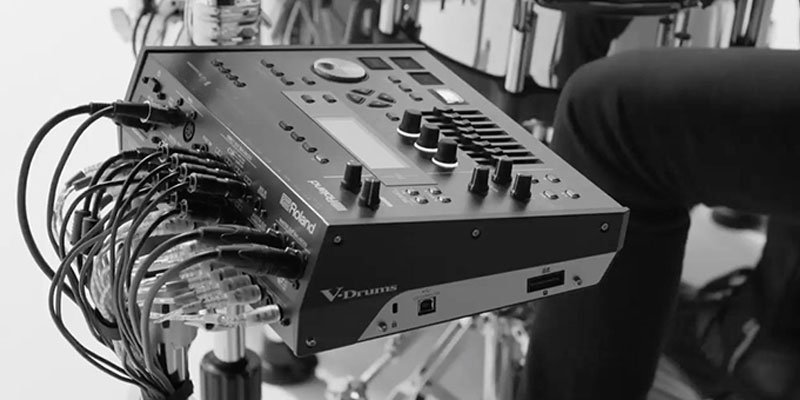
Screw the supplied mounting plate onto the module and connect all the straight jacks to the trigger inputs as marked.
If the jacks are ‘L’ shaped, you’ve set up the rack incorrectly so please go to Step 1 and confirm that straight jacks exit nearest the module.
6. Mount the Hi-Hat
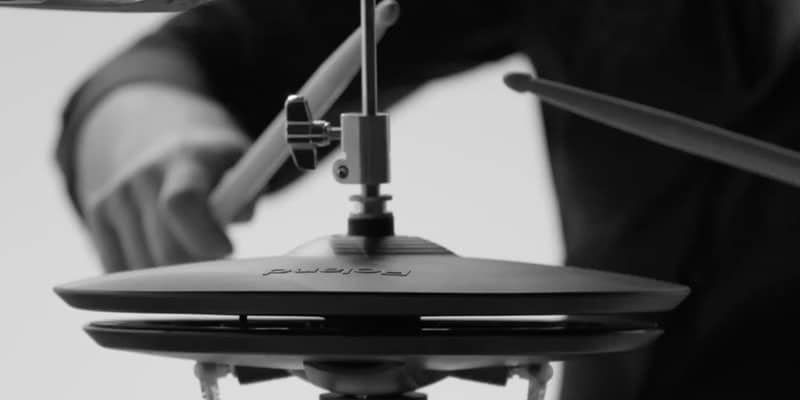
- Loosen off the tilt adjuster on the hi-hat stand so that it’s flat.
- The big metal felt washer goes on first, rubber side up.
- HHC goes on next. Connect the ‘L’ shaped lead marked ‘HHC’.
- Top hat goes on and connects with the HH lead.

- Loosen off the tilt adjuster on the hi-hat stand so that it’s flat.
- Bottom hat goes on, with the small raised triangle facing in toward the player.
- Fit the clutch to the top hat with the metal washer on top, between the top hat and the clutch.
- Connect the hi-hat link lead inside, between the top and bottom hats.
- Choose small ‘S’, medium ‘M’ or large ‘L’ hi-hat straps depending on the diameter of your hi-hat stand and fit it between the bottom of the hi-hat and stand to stop the lower hat from spinning.
*Connect the HHC and HH connectors and use the rubber cable-tie to keep the hi-hat leads contained. Connector labelled ‘HH’ goes to the left side of the hi-hat to the trigger output.
7. Tidy up the cabling
To tidy up the cabling, use the supplied clips to take up the slack in the cables.
Clip the jack leads for toms and cymbals into their rubber holders so that they don’t vibrate or interfere with the triggers, which can cause false-triggering and excess wear.
8. Module start and first time setup
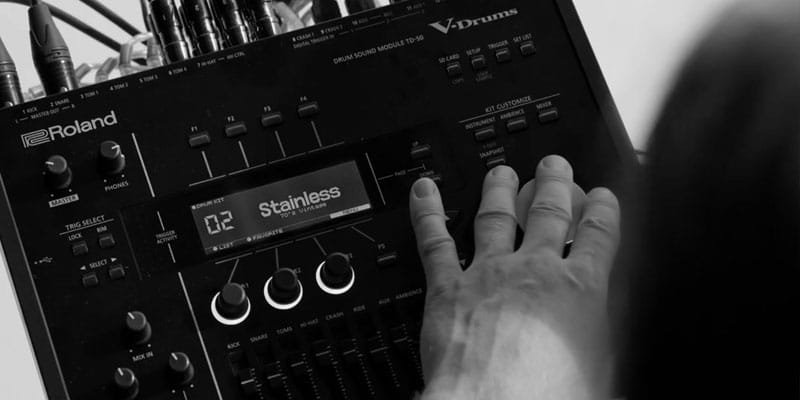
Once the module has started – IT’S ALMOST TIME TO PLAY!
But next in this quick start guide, you must choose your kit trigger configuration and calibrate the hi-hat.
Choose the kit Configuration
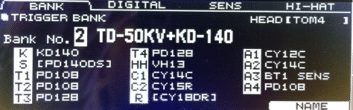
*Press [TRIGGER]-[F1] (BANK) and use the UP cursor to highlight the bank number.
*Use the [+ ] or [-] buttons to select your particular TD-50 configuration:
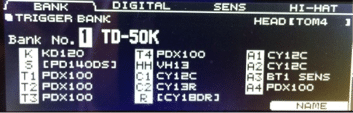
TD-50K (default),

Calibrate the hi-hat
VH-11
* Press [TRIGGER], [F4] (hi-hat).
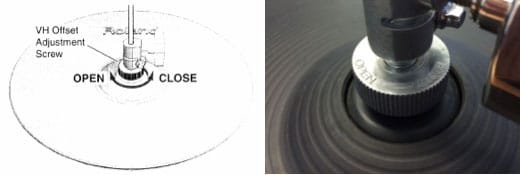
* Loosen the top hi-hat clutch.
* Use the open-close knob on the top of the hi-hat to centre the indicator between the arrows.
It’s calibrated or ‘zeroed’ when both left and right triangles are highlighted.

*You can now press [KIT] or [EXIT] to begin playing.
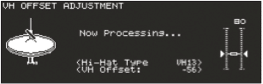
VH-13
*Press [F5] (OFFSET).
*Loosen the hi-hat top clutch and press [F5] (execute).
*When completed press [KIT] or [EXIT] to begin playing your TD-50!
9. Done. Enjoy your TD-50 and remember to eat and sleep!
Download this TD-50 Essential Quick Start Guide as a PDF here.
Related Articles
The Comprehensive Drummer’s Guide To The TD-50
Related Products


