The need for streaming courses to students online has never been greater. This guide is aimed to help teachers and lecturers navigate the often difficult and technical transition of delivering your normal face-to-face lessons as live streaming courses for your students. We will discuss the following:
Do I need a video streaming solution?
A typical streaming setup
‘How to’ stream to Facebook, YouTube & Zoom
What’s the best streaming solution for me?
Challenges and things to watch out for!
1. Do I need a video streaming solution?
Many courses don’t require face-to-face teaching or the use of computer presentations. For instance, course materials can be sent as a .pdf file via email and the student can study at home at their own pace.
That being said, there are many instances that this just doesn’t work.
The teachers I have spoken to over the past few weeks, who are now streaming their courses, include teachers from:
High School
University
Music schools
Dance Academies
Yoga Centres
It is interesting to see how each teacher has approached the challenges of delivering content online.
Common messages shared by all the teachers are:
Most courses need some restructuring to translate effectively online
Audio and visuals are important (lights, cameras, sound) to maintain student engagement
Handouts to accompany your online courses make a huge difference
Getting live feedback from students (via zoom chat etc) is really useful
The first stream is the hardest! Take your time to get everyone in your class comfortable
Some advantages of streaming live content:
Stream content directly to your class at any time of the day
With live streaming there is no post-production required
Your streams can be accessed/reviewed by students (anytime) – even the ones who missed the live broadcast
Add multi-media to your presentations including PowerPoint, videos, graphs, music etc.
Include chat and receive comments from your students during the class
Add value to your class by providing downloadable files
Live streaming your classes can be extremely effective. It is important to note that there are many levels of delivery available, depending on the needs of your students and the equipment used to stream.
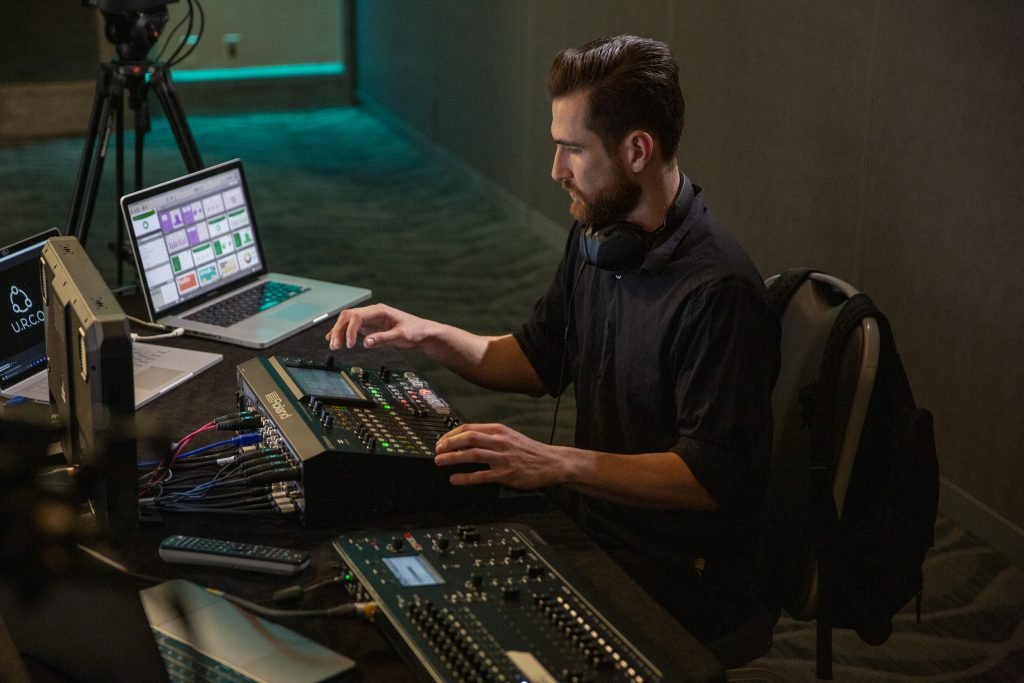
2. A typical setup
The simplest streaming set up would involve going to Facebook on your phone, pressing ‘live video’ on your timeline and pointing your phone’s camera at either yourself or a computer.
This approach has obvious limitations.
With a single camera and no dedicated audio source (microphone) the delivery of your message is pretty ordinary. As a result, you will struggle to hold your audience’s attention for any length of time.
Let’s look at a much better solution
In an ideal situation, you would have:
One or two cameras
two computers
a microphone
a small vision mixer with USB 3.0 streaming built-in
suitable lighting.
This may sound expensive and technically challenging. I assure you it isn’t.
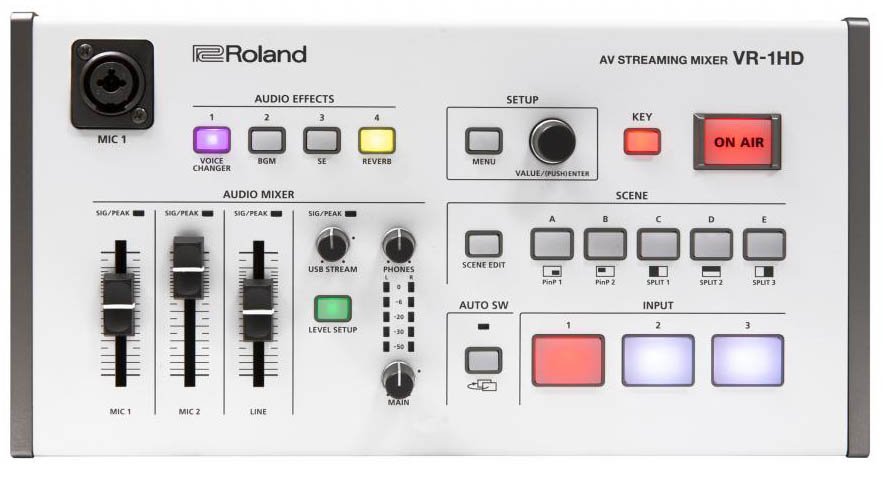
Sample setup using the VR-1HD A/V streaming switcher
Two Cameras
Cameras these days are exceptional! You will be pleased to know that you don’t have to use expensive video cameras to create a quality stream for your classes. I have used Handy Cams, Go Pros and even Smart Phones, and they have all performed very well.
The main advantage of using two cameras is that you are able to change the view for your audience. People are used to watching TV which continually switches between camera shots. A typical ‘scene’ would be to have a close-up (personal) camera, for when you are speaking to your class, and a wider view (slightly further away) so that the audience can see more of your environment. This is obviously more important for some classes than others.
A Microphone
Poor audio is probably the most common downfall of beginner streamers. A clear voice, that is easy to understand, is key to keeping your audience engaged.
I personally prefer lapel microphones, because they are very good for cutting out room noise and they deliver a consistent audio signal for your stream. They also allow you to move around without having to carry a microphone or adjust a mic on a stand.
You can purchase a reasonable lapel mic for around $50.
Two Computers
You will need at least one computer to stream your content. You can use this same computer to share course content with your audience, but it is often the weakest link in an online performance.
I prefer to have one laptop dedicated to streaming and a second laptop with a PowerPoint presentation, titles/logos, videos and even music preloaded on it. This makes your presentation interesting and the transitions between information ‘scenes’ seamless.
Lights
The lighting of your space is important to set the mood. This can be done with a simple overhead light and a lamp or two. The main thing is to test a few things beforehand to get it right.
If you need more light you can easily purchase something suitable from the hardware store to get you started and then maybe look at other options further down the track.
A Vision Mixer
Now this is when things get interesting!
A small vision mixer is the difference between an amateur looking stream and a quality production. It’s like having a mini TV station at your fingertips!
With a vision mixer you can plug-in multiple cameras, microphones, computers, laptops, smartphones, tablets and media players (depending on the number of inputs available). They also come with great features like picture in picture, split screen, smooth transitions and many other professional effects that will bring your presentation to life.
Some vision mixers come with a USB 3.0 output, and that really simplifies streaming. All you need to do is take the USB output from the vision mixer and plug it straight into the USB input of your laptop or computer.
You then open up the platform you want to stream on (FaceBook, Zoom etc) and the vision mixer will come up as an optional camera source! See the links below for more information on this.
3. How to Stream to Facebook, YouTube and Zoom
We have complied three ‘How-to’ posts to guide you through streaming to the following platforms:
Roland have been making streaming/recording switchers for over ten years and they are considered by many to be the professional’s choice. This is because they are:
Simple to use
Very robust and reliable
Compatible with different gear (computers, iPhones, tablets, Go Pros, Handy Cams etc)
Have an excellent knowledge base with loads of tips and tricks by professional users
The Roland VR Series of AV switchers have a dedicated USB 3.0 output and are genuine plug-and-play vision switchers. Here are three models that are very popular with a variety of teachers and instructors.
The Best Small-Scale All-in-One Streaming Solution
The Roland VR-1HD multi-camera AV streaming mixer delivers exceptional picture quality and sound and provides a complete streaming solution for teachers. It can be operated by a single person and requires virtually no training.
Connect, switch and stream cameras, computer presentations, smartphones and tablets through three scalable HDMI inputs. Audio can easily be mixed through line inputs and two studio quality XLR microphone inputs.
The VR-1HD also provides professional features like ‘picture in picture’, split screens and Chroma key to enhance the quality of your messaging.
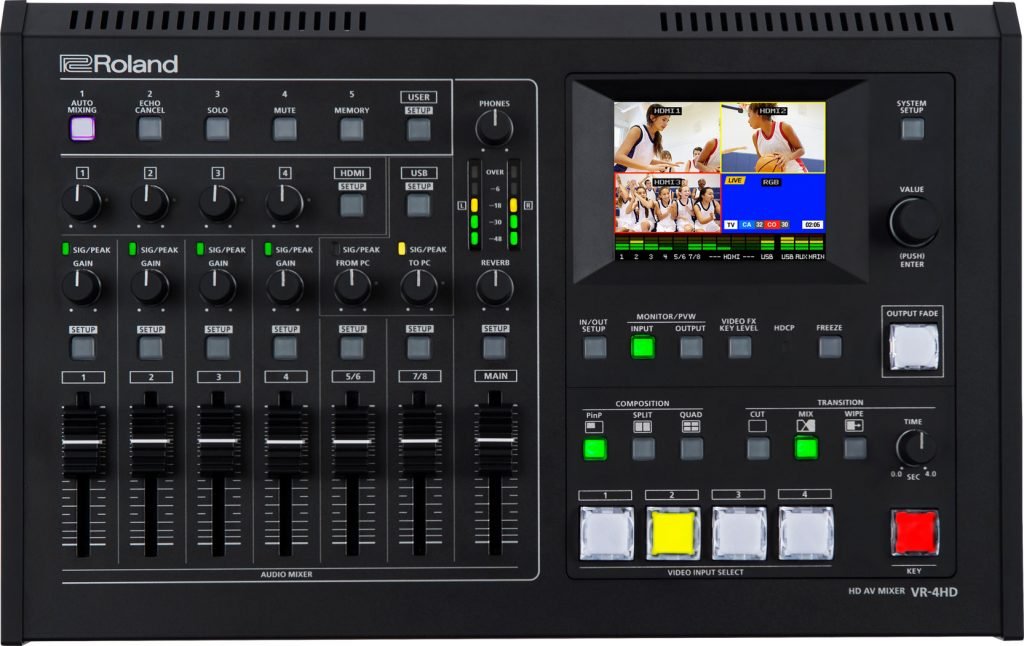
The VR-4HD is a complete HD studio in a compact and portable package that replaces several different pieces of complex A/V equipment. It beautifully integrates a digital audio mixer, video switcher, multi-viewer touch screen and a USB 3.0 video/audio streaming interface into a stand-alone device.
Designed with single-person operation in mind, the VR-4HD allows for easy switching and mixing of sound and video with smooth slider controls and buttons.
The VR-4HD is ideal for schools, universities and trainers.
The Best Large Scale All-in-One Streaming Solution
The VR-50HD MKII is an all-in-one, High Definition, multi-format AV mixer. Quite the mouthful!
It beautifully integrates a video switcher, an audio mixer and USB 3.0 audio/video streaming into an intuitive design that allows for single-person operation of sound and picture using faders, buttons and an on-board touch screen.
Impressively, the VR-50HD MKII also has direct control of PTZ cameras, automatic video switching functions and up to four-layer compositions on a single screen, including two picture-in-picture and ChromaKey overlays.
This portable ‘live HD production solution’ is ideal for large schools, universities and training applications.
5. Challenges and Things to Watch Out For
There are a few things that you should be aware of before you start streaming.
i) Always test before you go ‘live’
One of the biggest problems with most streams is that the live stream was not tested beforehand. This is a must!
Little things can go wrong like:
Too much/little level on the audio
Not enough bandwidth on your internet connection (it is recommended to have at least 2Mb/sec for a quality stream)
A faulty HDMI cable (see below)
ii) Prepare Your Lesson Well
Live streaming is different to teaching face-to-face. As mentioned above, some classes need to be modified to suit online delivery.
People’s attention span is harder to maintain when streaming. It is recommended that you have an outline of the lesson that you can share with the class before you start. It is also important to speak into the camera as often as possible and take things a little slower than you would normally go in class.
Also, humour works well to keep students engaged!
iii) Choosing a Streaming Provider
There are both free and paid streaming services to choose from.
Some considerations are as follows:
Free providers are suitable when:
Streaming shorter events
Leveraging your social audience (Facebook, Twitter, YouTube)
Minimal security and corporate branding is required
Paid providers are suitable when:
Security and user segmentation is important
Streaming longer presentations and events
Technical support required
Corporate branding is important
Popular providers include Facebook Live, YouTube Live, Zoom, Livestream and Ustream. Each of these providers has their advantages/disadvantages so it is recommended that you shop around to find the best service for your needs.
It is also possible to stream through applications like GoToMeeting and through video conferencing applications like Skype, Facetime, Hangouts etc.
Note: There is a wealth of knowledge online to help you find the best platform for your needs.
iv) About HDMI Adapters and Leads
If you are using lots of different sources, then you will more than likely need to get HDMI adapters to go from the device to the vision mixer. There are three sizes of adapter so make sure you get the right ones! They are:
Micro HDMI – Often required for Go Pros, Handy Cams and Mirrorless cameras
Mini HDMI – also required by some cameras and devices
Normal HDMI – required by the vision mixer
Note: As a rule, it’s safer not to use HDMI cables any more than about 5m in length, as beyond that, the signal can become weak enough to drop out.
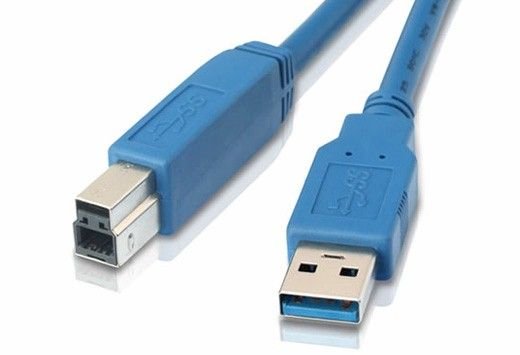
v) About USB 3.0 Cables
Make sure that you get a USB 3.0 cable to link from your vision switcher to your computer. If you try to use a USB 2.0 cable you will find that the vision switcher is not recognised by your computer and you will not be able to stream your content.
In Conclusion
As a teacher, delivering your classes as well as possible should always be your main focus. I hope that this article has given you all you need to get started with streaming your classes online.
Created by Roland V-Drums specialist Simon Ayton, these patches were designed using the internal factory sounds and many of the techniques covered in the TD-50 guide. Enjoy exploring the possibilities!