MIDI is one of the most versatile and useful aspects of modern music making and also one of the most misunderstood. Present in a huge range of instruments, modules, devices, and pieces of gear still to this day, MIDI was a true game changer. It’s release in the early 1980’s allowed different brands and models of equipment to communicate.
While completely different from audio and sound, MIDI can make a great team when used together. Lets Examine the difference between MIDI and AUDIO!
Contributed by Simon Ayton for Roland Corporation Australia
INDEX
MIDI Versus Audio
Audio or MIDI? – Why not use both!
How does MIDI work?
What does MIDI data look like?
MIDI FACTS
What does MIDI sound like?
Recording a MIDI performance
Recording the audio of your MIDI performance
MIDI Versus Audio
Since its invention in the early 1980’s, the Musical Instrument Digital Interface (MIDI) has become one of the most successful but also misunderstood technical innovations in musical instrument history.
MIDI was introduced to the musical world thanks to the vision of its creators – Roland founder Ikutaro Kakehashi, Oberheim Electronics founder Tom Oberheim and Sequential Circuits founder Dave Smith. You can learn more about it’s origins via Roland sound designer Adrian Scott here:
It allowed musical instruments from different companies to communicate with each other for the first time digitally, via a common language of numbers. Realizing its enormous potential, other manufacturers soon came on board to form a MIDI standards alliance, which continues to this day.
This revolution in communication allowed users to freely mix and match brands and instruments. Almost overnight, drum machines, samplers, synthesizers, effects units and even mixing controllers came fitted with MIDI’s now familiar IN, OUT and THRU five pin DIN connectors.
As well as fitting equipment with MIDI connectivity, an entire industry of computers and software also sprung up for the purpose of recording and editing music quickly and creatively. For some though, how and when to use MIDI is still a bit of a mystery.
Many synthesizers, drum machines, V-Drums modules and other electronic instruments feature both MIDI and audio outputs for capturing your musical masterpiece. But which one should you use? Let’s explore both options.
Audio or MIDI? – Why not use both!
If you are confused, it might be helpful to think of the difference as follows:
“Audio recording is about capturing the sound of the actual performance.”
“MIDI recording or ‘sequencing’ is about capturing the actual notes of the performance.”
Stereo audio is like a baked cake. It is not possible to remove the sugar or the flour, nor is it possible to remove specific sounds, tones or instruments once they appear on a recording. Sure, you can filter or EQ audio quite drastically (DJs do this regularly), but all recorded elements will still be sonically present in the audio to some degree.
Recorded MIDI on the other hand, is like having access to the cake recipe during development of the composition. It allows you to tweak this, remove that and modify everything about the ingredients – tasting it as you go.
MIDI is effectively multi-note and multi-channel recording for musicians and composers.
What is MIDI and how does it work?
MIDI itself makes no sound. Instead, the actual note number, note length and note velocity is sent to the MIDI-equipped instrument via a specified MIDI channel.
The channel is one that the device sending the MIDI data and the MIDI-equipped instrument receiving the data agree on, i.e. Channel 1. The instrument then produces the sound that’s assigned to that channel, i.e. if it’s a synthesizer then it can be a piano sound or a string sound.
MIDI information can be sent as both notes and data. It can also be used to control the patch or program number of any MIDI-equipped device.
Other data sent via MIDI includes information for controlling volume, pan, and program change messages, for switching sounds or kits.
It’s even possible to store all the information relating to the configuration of the MIDI instrument itself. This data is ‘System Exclusive’ information.

What does MIDI data look like?
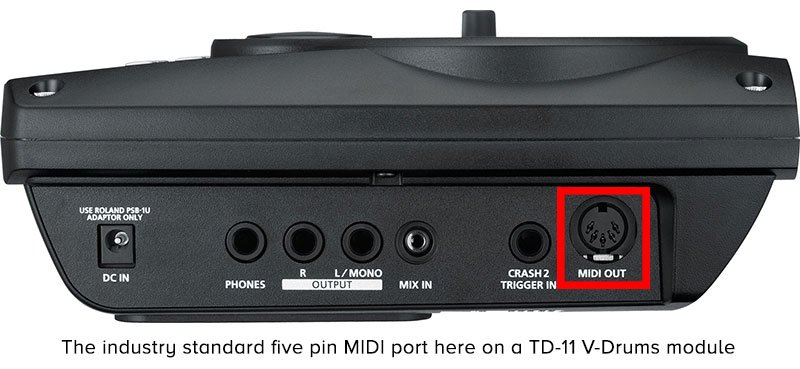
A typical note of recorded data from an electronic kick drum might look like this in your sequencer’s editor:
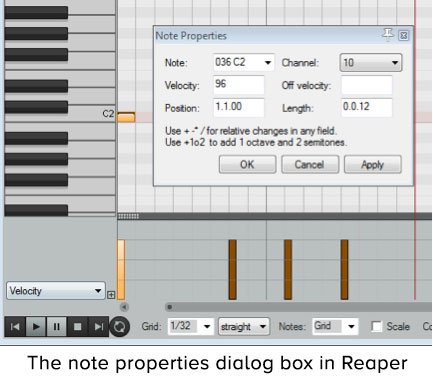
Here you will see that the kick drum performance is actually note number 036, which is also the musical note C2. It has a velocity of 96 on channel 10, on the first beat of bar 1.
Looking again, you will see that the ‘Length’ of the note is very short and there is no value shown in the ‘Off velocity’ box. This is because percussion sounds are single, instantaneous hits, rather than held notes from a keyboard.
The ‘note on’ is the important information for percussion. It’s where the sound generator determines the length of the sound, depending on how hard the note is played. For example, a hard velocity cymbal hit with a value of 100 will naturally sustain longer than a soft one at a velocity of 10.
MIDI FACTS
*It was invented in 1981 and standardized in 1983.
*MIDI transmits over 16 channels.
*It uses 128 different numbers representing C0 to C9 in the musical scale with velocity values ranging from 0 to 127.
*The data needs a sound engine or software plug-in to generate sound.
*Sounds can be anything – from real-world samples or sampled acoustic instruments to synthetic sounds generated by a synthesizer.
*MIDI notes can play any type of MIDI instrument, on any channel, regardless of the original note information, manufacturer, or even type of instrument that it is sent to.
*The data takes up much less space and system resources than audio, so it’s quicker and easier to share via email.
What does MIDI sound like?
You can use any MIDI instrument as the sound generator destination for the MIDI data. A software sound source inside your DAW program can also generate the sound.
Many software-sequencing programs include their own sound library that you can utilize for your MIDI notes. There are also many different software plug-ins available, designed specifically to work with MIDI.
Recording a MIDI performance
If your instrument has a conventional MIDI output, you will need a MIDI-to-USB interface to capture MIDI notes into your computer.
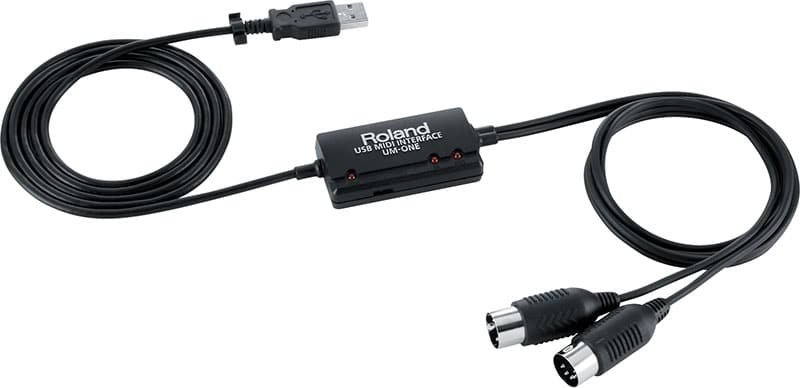
Once your computer has recognized your MIDI interface, you will find it as an input and output option on the MIDI port settings of your program.
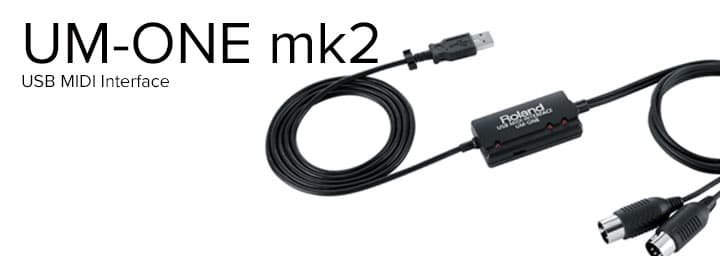
You can record any conventional MIDI instrument into your MAC or PC via USB using a UM-ONE MKII.
You can even use it with your iOS device such as an iPod or iPhone via Apple’s camera connect kit.
Recording the audio of your MIDI performance
Once you’ve edited your MIDI performance, you can then record the sound of the MIDI instrument of your choice as audio.
Do this in order to combine the sound of the instrument generated from the MIDI performance with other audio tracks, like voice and acoustic guitar to create a final stereo mix that anyone can hear.
If a sequencing software plug-in is generating your sounds, simply choose your sounds during the final mix-down. That is, once you have recorded the other instrument parts. Another option is to do alternate versions of the mix by simply changing the sounds before each mix down.
You can decide on your favorite sounds later or even cut between them. You may want to choose different sounds for the verses and choruses. Everything is possible!
To top it off, you can keep your original MIDI recordings and return to them at any time! This way, you can re-capture a new take of audio for remixes.
Using the quantize features often found in sequencing software, you can even correct the timing of your MIDI recording. Alternatively, you can re-purpose it for use in another piece of music with an entirely different tempo, feel and time signature.
So now, you know the difference between MIDI and audio and have a clearer understanding of how you can make them work for your music.
Related Articles
COMPUTER MUSIC PRODUCTION FOR BEGINNERS PART 1: THE ESSENTIALS
THE A-Z OF RECORDING
COMPUTER MUSIC PRODUCTION FOR BEGINNERS PART 2: RECORDING AND COMPOSITION
10 WAYS GUARANTEED TO QUICKLY IMPROVE YOUR MUSIC PRODUCTION
COMPUTER MUSIC PRODUCTION FOR BEGINNERS PART 3: MIXING


