This article covers the best and easiest way to record TD-27 V-Drums.
Recording electronic drums is simple when compared to recording acoustic drums.
Acoustic drum recording is considered by many people to be an art form.
Finding the balance between equipment, knowledge, patience and money that works for your project is a skill that comes with experience and time.
Being a collection of various percussion instruments, a drum kit requires different types of microphones and positioning to make one cohesive drum kit sound.
Capturing a great performance is difficult when you’re also the one recording the drums. Fortunately, there are ways to minimize your work flow and maximize your performance!
Contributed by Simon Ayton for Roland Corporation Australia
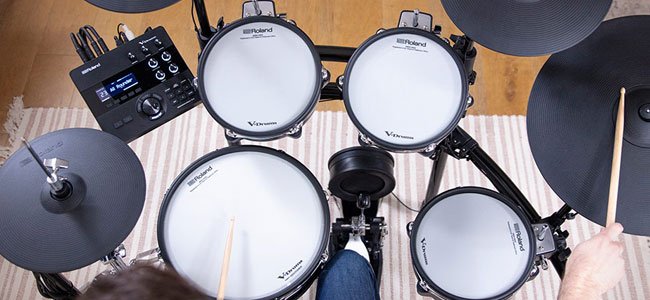
Enter Electronic Drums…
Compared to recording acoustic drums, recording electronic drums is simple.
You can record V-Drums almost anywhere.
The TD-27 will fit quickly into a recording space and with unlimited sound and performance possibilities, your options for creativity are increased dramatically.
When recording V-Drums, you can forget about tuning, muffling, microphone positioning and microphone preamplifiers.
Say goodbye to specially designed studios, noise problems and studio hire fees, allowing you to relax, focus on the music and just play.
V-Drums are ideal for recording yourself, because their simplicity means you can focus on your actual performance, safe in the knowledge that every note will be captured perfectly. Sound decisions can always be decided later.
The aim of this V-Drums recording masterclass article series is to break down and simplify the process of recording electronic drums.
You will be able to achieve great results, with just basic connections and knowledge.
Recording the TD-27 equipped VAD-503/506 series V-Drums
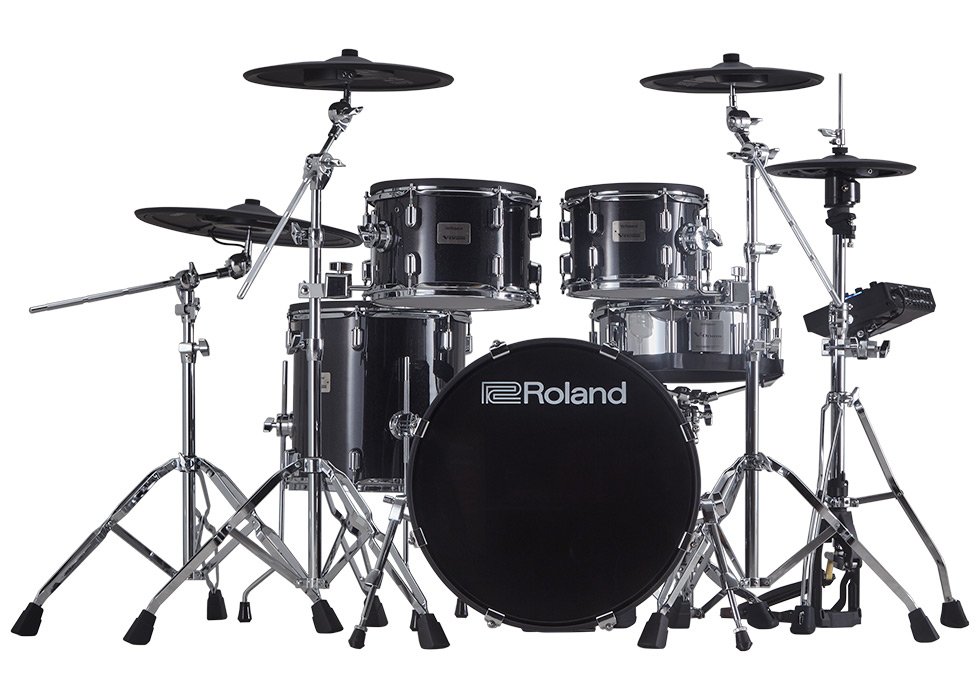
The Roland TD-27 based TD-27KV and VAD-506 & VAD-503 kits are so easy to record.
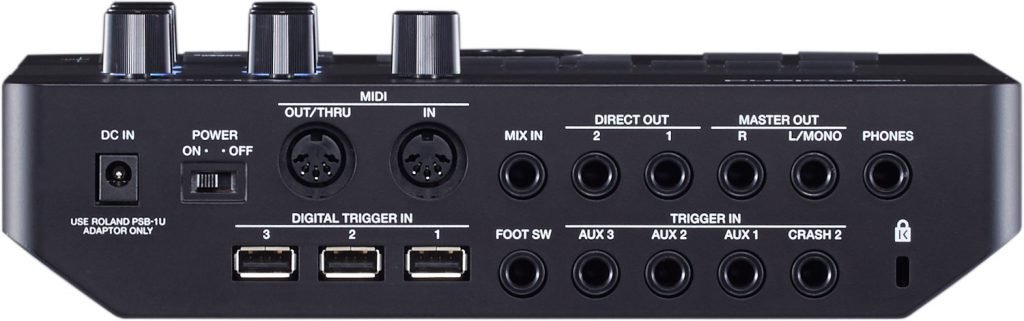
For connection and recording options, there are four analog audio outputs along with conventional MIDI IN/OUT and multi-channel USB Audio/MIDI. But which recording method should you use?
See our MIDI versus Audio article for information on recording audio and MIDI.
Let’s jump right into combined MIDI and audio recording with the TD-27, as it offers the most flexibility and ultimately, the best sound for your final mix.
Recording MIDI and Audio
There are essentially two recording methods to use with your TD-27 kit.
Method 1: Combined Audio and MIDI
Using the USB MIDI/Audio port alone, you can record both the MIDI performance and multiple tracks of audio at the same time.
You can even hear a four channel playback from the recording software while tracking, using the TD-27’s 28×4 drivers. This is very useful, as the backing track you are playing to, along with the click, each have their own controls on the front panel of the TD-27.

*NOTE: You can also use the conventional MIDI DIN plug connections of the TD-27 to record a MIDI performance into your existing audio/MIDI interface. When doing this, be sure to turn MIDI local control off on your V-Drums kit, to avoid hearing locally played kit sounds AND the notes coming back in the MIDI IN at the same time.*
Here’s how a track of MIDI and a single stereo audio track will typically look in a sequencing program or DAW (digital audio workstation).
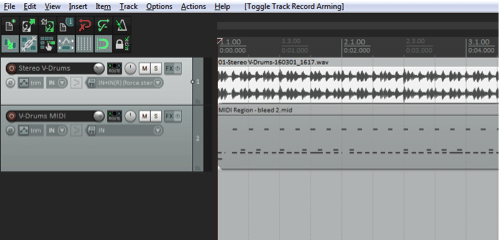
MIDI and stereo audio recording with the TD-27
This first method of recording MIDI and stereo audio together is useful when capturing a live performance with a band, to give you instant audio playback when the module is no longer available.
This method also offers editing options later, using the MIDI data and any other sound source.
![]()
Method 2: Recording MIDI
Many musicians find this second method, of capturing a MIDI performance and then adding audio later, to be an excellent procedure for studio work.
It offers both creativity in the recording process and the best control over the final sound mix.
Here are the typical steps for the second method:
- Record your MIDI performance into your sequencing program.


- Playback and edit the note performance.
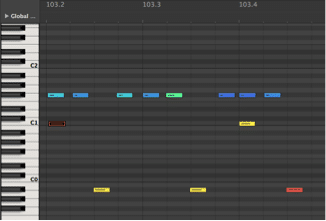
- Choose and tweak your ideal sounds either from your sound module or plug-in sound library.
- Record the resultant external audio into one or more tracks.
- Utilize any audio effects such as EQ, compression or reverb.
- Mix the audio as a final stereo file for release.
The big advantage of recording via MIDI is that you can leave sound choices until later and just concentrate on the performance.
KEY POINTS
- Alter each note of your performance if you make a mistake or remove notes completely if you overplay. Quantize MIDI to correct timing issues. You can even change a straight feel to a swung feel for a completely new performance.
- MIDI recording uses very little space compared to audio, so you can continue recording as many takes as you like without using vital hard drive space.
- Leave sound choices until the final mix, once you have recorded other instrument parts to make sure that they all blend together well.
- Alternate versions of the mix can be achieved simply by changing the drum sounds for each mix. You can decide later which to use, or even cut between them. For example, you may want to choose different kit sounds for the verses and choruses!
- Everything is possible by recording MIDI first and audio last.
Recording Multi-Channel Audio
Once you’ve edited the MIDI performance and chosen sounds, it’s time to record the performance as audio back into the software.
Here, it will be combined with other audio tracks for a finished song.
Recording the audio signal can be achieved with the TD-27’s four analog output channels plugged into an audio interface.
This is done via the analog master outputs, the direct outs, or digitally via the TD-27’s built-in USB port.
To record multi-channel audio with the TD-27, switch the module to “VENDOR” driver mode.
Change this setting in the TD-27 via SYSTEM-USB AUDIO.
The USB port is capable of 28 channel audio at sample and bit rates up to 96kHz at 24bit.
This technique of recording drum sounds onto separate tracks is the way to go if you want to edit, EQ, add effects or compress the sounds in the mix.
It also makes it easy to output the recorded tracks into separate channels of an external mixer, or to send the tracks to someone else to remix.
GET THE DRIVER!
![]()
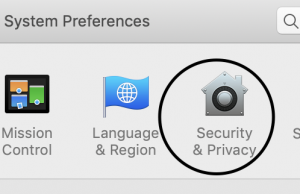
When recording via USB outputs, you will need to switch the TD-27 Driver mode to “VENDOR” and download the driver for your operating system. On OSX you also need to ‘Allow’ the driver to be installed in system preferences/Security & Privacy.
MAC OSX Link Here
Windows 10
Driver is installed automatically when connected to the internet.
If you get a security message when installing the driver, allow it in your Security Preferences.

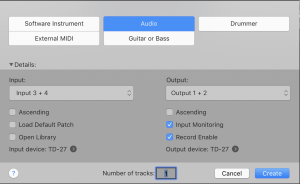
Once the driver is installed, select the driver in your software recording program.

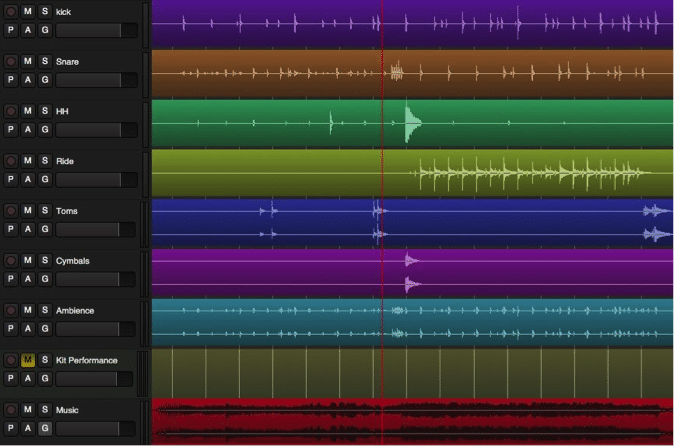
Create a new stereo audio track for each drum kit instrument you want to record and
choose the inputs for each one eg: Direct Outs are 3-4 and kick is 5-6 etc as shown below .
The TD-27 is already configured for 14 stereo multi-channel audio as follows:
Track#
- 1= stereo Ch1-2 MASTER OUT
- 2 = stereo DIRECT 3-4 OUT
- 3 = stereo Ch5-6 KICK
- 4 = stereo Ch7-8 SNARE
- 5 = stereo Ch9-10 TOM 1
- 6 = stereo Ch11-12 TOM 2
- 7 = stereo Ch13-14 TOM 3
- 8=stereo Ch15-16 HI-HAT
- 9 = stereo Ch17-18 CRASH 1
- 10 = stereo Ch19-20 CRASH 2
- 11 = stereo Ch21-22 RIDE
- 12 = stereo Ch23-24 AUX 1
- 13 = stereo Ch25-26 AUX 2
- 14 = stereo Ch27-28 AUX 3
![]()
When recording via the analog outputs, you will need an audio interface such as the UA-1010 or UA-1610. ![]()