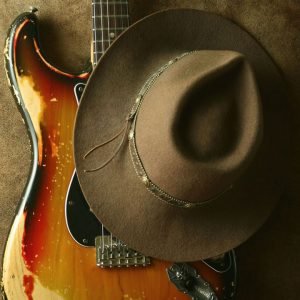
Voodoo Child (Slight Return) is the final track on the 3rd (and, unfortunately final) 1968 studio album, Electric Ladyland, by the legendary guitarist Jimi Hendrix.
From the classic rocking wah fade-in, to the explosion of the whole band entering the riff, this is the sound of a guitar amplifier at full tilt! The classic fuzz tone fattening out the Strat single coils is classic Hendrix and just a great tone.
While there doesn’t seem to be an exact record of the gear that Jimi used for this recording, we can have a pretty good guess based on his live rig at the time and how his amp had been recorded previously.
To recreate this tone, I’m going to use the BOSS GT-1, entry-level multi-effects unit. While it’s great if you can afford all of Hendrix’s original rig (or buy a house for the same money), that still doesn’t help you to simulate all of the other elements of the recording process, which I’ll explain in a moment.
For this tone, we’re looking for 2 variations of the sound based on the ‘Wah Intro’ and the ‘Full Riff’. We can be fairly sure that this was all done in one take, (as was more the style of recording back then, and Hendrix was known for it). The same gear was probably plugged in for both of those tones, and just switched in and out as needed. This means that we can construct a base amplifier tone and then build on that by adding a gain pedal and wah to the mix. There are also some other effects that were added after the recording was done (in the mixing process) and some other audio characteristics of the room mic that was on the amplifier, but we’ll get to that as we go through the steps of Tone Creation.
Firstly, let’s break down the components of tone in a process I call the 4 Elements of Tone.
Visit guitarfxpatches.com and download free guitar tone from Voodoo Child (Slight Return) using Discount Code: GT1VOODOO
Contributed by Josh Munday – Tone Designer for the Roland Australia Blog
1. The Guitar
 This was probably a Fender Strat. Hendrix famously played a right-handed Fender Strat that was restrung upside down for him, as he was a left-handed player. This did have the consequence of slightly changing the tone of the bridge’s single-coil pickup, because its angle is facing the opposite way around, making the lower “E” string slightly brighter and the higher pitched strings slightly duller. But, it’s a fairly subtle difference that we can compensate for in the GT-1 if it’s required. I used a Mexican Fender Strat in the video for this tone design segment. I like to use very “plain” and familiar sounding guitars for tone design, because it’s easier for others to replicate and shows that this is possible even with basic/affordable gear (i.e. Mexican Strat + GT-1).
2. The Pickup Selection
 A Fender Strat has 3 single coil pickups. For the Wah Intro, we can hear a softer, more “hollow” tone. This is characteristic of the neck pickup. For the Full Riff, we’ll switch to the bridge pickup, as it’s a harsher/brighter tone (although the fuzz pedal does thicken and soften the brightness of that pickup selection).
3. The Amp
 NOTE: Usually at this stage, I would start going through the amp settings, but before we do that, there’s an effects adjustment you might want to make. With this particular tone, Jimi is tuned to Eb, so you have some choices here.
You can either:
1. Tune to Eb.
2. Play the song in E.
3. Use the FX1 section of the GT-1 to tune down to Eb, (which is what I have done as I played this within a medley of famous guitar tones, so I didn’t have the luxury of re-tuning for this song).
No matter which option you choose, you should do it before we begin the process of Tone Design, as all of these options change the tone of your guitar somewhat (especially using the pitch shift effect).
If you want to use the GT-1 to de-tune, go to the FX1 section at the start of the signal chain, select PITCH SHIFTER and turn the PITCH to -1, EFFECT LEVEL to 100 and DIRECT LEVEL to 0.
Now on to the amp…
Although we have no official confirmation, this was most likely his Marshall 100 watt Super Lead 100 amp head into 2 x 4×12 speaker cabinets. Hendrix liked it LOUD, so it would have been cranked to get all of the wonderful breakup that comes from both the valve power amp section of the amplifier and the speakers at that volume.
When selecting an amp, there are some basic rules of thumb that will help:
ALWAYS START WITH EVERYTHING OFF!!!
I can’t stress this enough. Find the OFF button for everything in the signal chain, so all you can hear is your dry old guitar sound coming through. Remember, any multi-FX/amp simulator like the BOSS GT-1 is just simulating a room full of gear, so think about it like that. You wouldn’t walk into a room full of amps and FX and start by turning everything ON would you? You would plug into an amp, get a good basic tone, then turn on any effects one at a time and build up your sound…likewise with any multi-FX.
- Set the EQ “flat” (i.e. all settings at the halfway point or 12 o’clock). This gives you a neutral starting point so that the EQ isn’t colouring the tone too much yet.
- Put the gain up to about a quarter to half a turn, so you can hear the gain character.
We’re looking for the basic amp tone to start with and in the recording, for just a few seconds before Jimi starts singing the first verse, he clicks off the fuzz pedal. There’s no wah on at this point, so it’s a great little insight into the basic amp tone. Let’s start by selecting the MS1959 I amp setting in the GT-1. This amp has some nice Marshall-type characteristics that we’re after and is a little brighter that the MS1959 II setting. I’ll often use extreme EQ settings. Remember that we’re trying to reproduce the “recorded” version of this tone, which means that even though Hendrix might not have been running these EQ settings, the mixing and mastering processes can change the tone. So, we might need to make adjustments that seem a little “outside the box”.
The settings I’ve chosen are:
- GAIN – 40
- BASS – 70
- MIDDLE – 100. Just boosting the MIDDLE on the amp setting all the way still wasn’t enough for this tone, so I also used the EQ in the MASTER SETTING section of the signal chain to boost the MID GAIN setting. I used a setting of +7dB, and you can select the frequency of the midrange in this part, so I turned this to 800Hz to try and simulate the specific midrange frequency.
- TREBLE – 80
- PRESENCE – 35
As well as the EQ setting for the amp, I’ve also used the EQ that is within the MASTER SETTINGS part of the signal chain to tweak the tone some more. Boosting or cutting the EQ on the amplifier simulator has a different effect on the tone than the MASTER SETTING part. Think of the AMP EQ as changing the EQ on the Virtual Amplifier and the MASTER SETTINGS EQ as changing the EQ on the mixing board after it has been recorded.
The settings I’ve selected in the MASTER SETTINGS section are:
- PATCH LEVEL – 24
- LOW GAIN – 0
- MID GAIN – 7
- MID FREQ – You can also select the frequency of the midrange in this part, so I turned this to 800Hz to try and simulate the specific midrange frequency of the recording.
- Q MID – 1. The “Q” determines how much the frequencies surrounding the midrange frequency you’ve set will be affected. The lower the number, the more frequencies surrounding the MID FREQ setting will be affected when you boost or cut in the MID GAIN setting
- HIGH GAIN – 0
You might have noticed that I’ve only put the GAIN up to 40 for the intro, as it’s a fairly clean tone. Remember that we’ll be adding a gain pedal shortly to add more gain for the Full Riff. I’ve also left the speaker type setting on ORIGINAL. Any time you leave the setting on ORIGINAL, it selects the speaker type most commonly used with that amplifier type.
That should start to get us close to that vintage Marshall recorded tone. Now to the effects.
4. The Effects
 Before we get started on the effects section, I just want to explain what I mean by “Effects”. This can mean not only traditional effects that you would run in the main input or in the effects loop of your amplifier (such as overdrive pedals, chorus, etc) but also any effects that were added later in the mixing process or “Post-Production” effects.
Delays for instance, are often added after the track has been recorded and would not have been heard by the guitarist at the time of recording. Other elements that I would count in the Effects section are:
- EQ and Compression added in the mixing stage.
- The microphone that is on the speaker cabinet. What did it sound like?
- Was there a second microphone in the room away from the speaker cabinet?
- How far away from the speaker cabinet was the mic?
- How loud is that second mic in the mix?
- What did the room sound like from that room mic?
- etc…etc…etc….and on and on it goes.
Now, this is starting to sound super-complicated right? Well, let’s just go through each part step-by-step and I’ll take you through how we can simulate some of these elements.
Let’s begin with the effects that won’t change between the Wah Intro and Full Riff.
Room Microphone Simulation
In many guitar recordings, we are hearing much more than just the amplifier with a microphone on the speaker. Often there is another mic in the room that can be a few feet away from the speaker. This microphone will have a different tone (by virtue of the distance) and can pick up some of the ambience from the room. Depending on how loud this room mic is in the final mix, it can alter the tone quite significantly and can change the EQ and some of the character of the sound through phasing. When 2 source signals are turned up in the mix, the frequencies interfere with each other. This can have a desirable effect, or not so desirable, depending on the placement of both the close and room mic.
In the BOSS GT-1, we don’t have the luxury of selecting a room mic and/or managing its placement in the “Virtual Room”, but there is a trick that I use quite often that can simulate the room mic as a “quick and dirty” replacement and often works quite well.
While I haven’t been able to find enough detail about this recording session to know for sure, in previous Hendrix recordings (i.e. Foxy Lady), there was a room mic placed approx. 12 feet from the speaker cabinet. At 12 feet, there is quite a “wallop” in the guitar tone, since this is enough time to audibly hear the slight delay.
WARNING: AUDIO GEEKERY COMING UP!
Because sound travels at approximately 1 foot per millisecond, (it’s actually 1.13 feet per millisecond but who’s counting!?) we can simulate the microphone in the room with a single delay timed at the appropriate millisecond setting. So, for a mic 12 feet away from the speaker we set a single delay at 12ms. If you put it up too loud, sometimes you can hear a “metallic” effect to the tone.
So in the GT-1, go to the DELAY setting in the signal chain and use the following settings:
- TYPE – STANDARD.
- TIME – 12ms. There’s our 12 foot away room mic.
- FEEDBACK – 0. Which means just a single delay.
- E.LEVEL – 83. This is quite loud in our virtual “mix” and will have an influence on the tone that you can hear. Try it even louder and switch it on and off to hear the difference.
Reverb
I’ve added some “space” to this tone by using the ROOM setting in the REVERB section of the signal chain. The settings I’ve used are:
- TYPE – ROOM
- TIME – 1.5s
- E.LEVEL – 40
Over the page, you will see 2 more settings – LOW CUT and HIGH CUT. These 2 settings dictate how large a frequency band you will hear the reverb in. Since this is an older recording, it’s quite limited in the range that you hear. So, I’ve cut everything from 160Hz down and 4kHz up. This produces a more midrange focused reverb. Settings are:
- LOW CUT – 160Hz
- HIGH CUT – 4.00kHz
Now, on to the specific effects used for the Wah Intro.
Wah Intro Effects
Pickup Tone Modification
Firstly, I’ve used a Strat which has 3 single coil pickups, so the tone of both the bridge and neck pickups are close enough to the Strat that Hendrix used. If you have a humbucker in the bridge and/or neck position, you might want to use the ‘Hum-Single’ converter feature in the FX1/COMP section of the GT-1 that’s included within an effect called GUITAR SIMULATOR. This will thin out your thick humbucker tone and get closer to the biting tone of a Strat (that’s if you’re not already using the FX1/COMP for the Pitch Shift effect to tune down to Eb. If you are, then you won’t be able to use it for this function).
The pickup selection for the Wah Intro is the Neck Single Coil.
Wah Intro Delay
The Wah Intro section has a delay that would have been added later on in the mixing stage. It’s a panned delay that you can hear in one speaker only (i.e. a panned delay). Because we’ve already used the main DELAY section for the room mic simulation, I’ve set this delay up in the FX2/MOD. Go to FX2/MOD and select SUB DELAY with the TYPE knob.
The settings I’ve selected on this delay are:
- TIME – 190ms
- FEEDBACK – 0 (this means only a single delay).
- E.LEVEL – 56
Then press ENTER to go over the page…
- TYPE – PAN
- TAP TIME – 50%
- D.LEVEL – 100
- And on page 3, leave the HIGH CUT on full or FLAT.
Wah Pedal
Jimi was famous for using Vox Wah pedals (and in particular the Vox Clyde McCoy picture wah that go for thousands of dollars these days). To replicate this, I’ve selected a VOX WAH in the PDL section of the signal chain. You won’t need to change any other settings.
Now, on to the Full Riff.
Full Riff Effects
For this section, we’ll switch off the Wah and turn on the gain pedal in the front of the amp. One of the really great features of the BOSS GT-1 is that we can do both of these things with a single press of the CTL1 pedal (I’ll show you how to assign this at the end).
Gain Pedal
Knowing the exact gear that was used in a recording is sometimes very useful. Other times, it leads you down a path of trying to “make” something work. This was the way it went for me trying to find the correct gain pedal setting for this tone. Because I “knew” that Hendrix used a fuzz pedal, I tried to make each of the 3 fuzz pedal options in the OD/DS section of the signal chain work for this particular tone. In the end, I used the CLEAN BOOST pedal to drive the input of the Virtual Amp harder, and that was closer than any of the fuzz pedal settings. This highlights a common problem where you “mix with your eyes rather than your ears”.
I used these settings:
- TYPE – CLEAN BST
- DRIVE – 120 (Full!)
- E.LEVEL – 56
Then over the page, I’ve boosted the pedal’s EQ settings.
- TONE – +16
- BOTTOM – +14
- D.LEVEL – 0
Control Pedal Assign
For the last trick, rather than pushing down on the “toe” part of the expression pedal to turn off the Wah and then pressing the Control Pedal to turn on the gain pedal, we can do this all with the Control Pedal so it’s a smooth transition from the Wah Intro to the Main Riff.
Here’s how to do it:
Go along to the CT1 section of the signal chain, (right across to the left of the page). The setting for that page is:
- FUNCTION – OD/DS
- MODE – TOGGLE
Now, go further to the left to the section called A1. This is an “assignable control”, meaning we can select a controller or SOURCE, e.g. CTL1 Pedal or EXPRESSION PEDAL or even the external CTL and EXPRESSION that you can add in the input. Then, select a CATEGORY (e.g. the effect you want to control) and then the TARGET, meaning what part of that effect you want to control, (e.g. for DELAY you could alter the TIME or FEEDBACK).
Our settings for A1 are:
- ASSIGN – ON
- SOURCE – CTL1
- MODE – TOGGLE
- Over the page.
- CATEGORY – PEDAL FX
- TARGET – ON/OFF
And that’s it!
There you have it guys, the guitar tone from Voodoo Child (Slight Return). If you have a BOSS GT-1 and don’t want to have to program this tone yourself, you can download it from my website.
Website = guitarfxpatches.com
Related Articles
THE BEATLES ‘REVOLUTION’ TONE DISSECTED
THE POLICE ‘WALKING ON THE MOON’ TONE DISSECTED
STEVIE RAY VAUGHAN ‘PRIDE AND JOY’ TONE DISSECTED
VAN HALEN ‘ERUPTION’ TONE DISSECTED
FOUR ELEMENTS OF GUITAR TONE
TONES IN TIME – 60S ROCK
JIMI HENDRIX’S ‘FOXY LADY’ TONE DISSECTED
Related Product