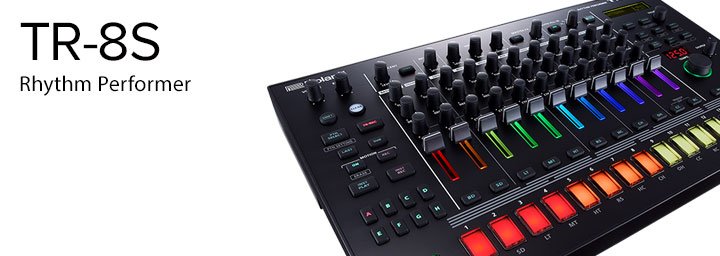
This article explores methods for creating a Melodic Bassline in the TR-8S Rhythm Per-former. Of course this same approach can be used for adding a melodic element to any Instrument on the TR-8S, as well as your to own Samples loaded into it.
Start with a Pattern that already has a basic drum beat in it, or create one from scratch if you like. For a refresher on how to create a Pattern, take a look at Creating a Pattern in TR-REC Mode.
The idea is to assign Bass Tones to one or more of the Instruments [BD-RC], then use the Coarse Tune Parameter to adjust the tuning of the Bass over the course of the Pat-tern, to give your Bassline a melody. For this example, use the LT (Low Tom) Track for your Bass Tone.
- Press the INST Play Button to enter Instrument Play Mode.
- Press the LT Button to select the Low Tom Instrument.
- Turn the Tune Knob of the Low Tom Track to set the Tune Value to zero.
- Press the INST Button to view the Instrument Select Screen.
- Hold the Shift Button and turn the Value Knob to select the Bass Category. The In-strument Category shows in the upper right corner of the Display.
- Release the Shift Button and turn the Value Knob to select a Bass Tone. You can press Pad [3] to audition the Tones as you turn the Value Knob to select them.
- Press Variation Button A. Press the Start/Stop Button to play your Pattern.
- Press the TR-REC Button then press some of the Pads [1-16] to program a Bass part for Variation A.
- Press Variation Button B then press some of the Pads [1-16] to add a Bass part to Variation B.
- Next, to assign the Coarse Tune Parameter to the LT CTRL Knob, hold the CTRL Select Button and turn the CTRL Knob on the Low Tom Track to select Coarse.
- Press the INST Play Button to enter Instrument Play Mode.
- Press the Variation A Button then press the Start/Stop Button to play your Pattern.
- Next turn the CTRL Knob on the LT Track to change the tuning of the Bass as the Pattern plays. Practice until you have a Bassline melody you like.
- To record your tuning into the Pattern Variation, press the Motion REC Button and then turn the CTRL Knob on the LT Track to perform your tuning changes as the Pattern plays. Press the Motion REC Button again to turn off Motion Recording.
- To playback the tuning changes you’ve recorded, press the Motion On Button.
- If you’d like to erase the tuning and do another take, hold the Motion On Button and turn the CTRL Knob on the LT Track to erase the Motion Data on that track.
- Next press the Variation B Button, then press the Motion REC Button to engage Motion Recording again and turn the CTRL Knob on the LT track to record tuning.
- To play both Variations A and B one after the other, press both Variation Buttons at the same time. Both Variation Buttons will light green, the currently playing Varia-tion’s Button flashes.
PRO TIP 1
Try the same steps as above on the MT Track, recording a different Bass Pattern and Tone, as well as different tunings.
In this way you can have two different melodic Basslines with different Bass Tones in the same Pattern, one on the LT Track and one on the MT Track.
To switch back and forth between the two Basslines, hold the Mute Button and press the LT or MT Button to mute one or the other of the Tracks.
PRO TIP 2
Tuning Instruments to Musical Notes
When a pitched Instrument Tone, like a Synth or Bass sound is selected, and the Tune Knob is set to a value of 0, the Instrument plays a C. You can tune the Instrument to specific musical notes by setting the Tune Knob to the following values:
| Set the Tune Knob To: | To Play This Note: |
|---|---|
| +127 | C |
| +116 | B |
| +106 | A#/Bb |
| +95 | A |
| +85 | G#/Ab |
| +74 | G |
| +63 | F#/Gb |
| +53 | F |
| +42 | E |
| +32 | D#/Eb |
| +21 | D |
| +11 | C#/Db |
| 0 | C |
| -11 | B |
| -21 | Bb/A# |
| -32 | A |
| -43 | Ab/G# |
| -53 | G |
| -64 | Gb/F# |
| -75 | F |
| -85 | E |
| -96 | Eb/D# |
| -107 | D |
| -117 | Db/C# |
| -128 | C |
PRO TIP 3
Another approach is to tune individual Steps in your Pattern to program a melody. Here’s how to do it:
- Press the Instrument Select Button of the desired Instrument to select it.
- Press the TR-REC Button to engage Step Recording.
- Press the desired Step Buttons [1-16] to choose the Steps on which the Instrument will play.
- Hold the CTRL Select Button and turn the CTRL Knob of the selected Instrument to assign the CTRL Knob to Coarse.
- Press and Hold the first Step that you want to tune, then turn the CTRL Knob of the selected Instrument to set a Coarse Tune Value for that Step.
- Repeat step 5 above for all of the Steps in your Pattern you wish to tune.
- Press the Motion On Button to turn it on.
Coarse tune settings are in Half Steps, with 0 being the musical note C, and each number higher or lower being a half step up or down from C.
The Motion On Button must be lit for your Instrument to play back with the pro-grammed tunings.
Article written by Alex Marlowe
 Alex Marlowe is a Composer/Producer, Musician and Consultant based in Melbourne, Australia. Alex has placed music in numerous movies and TV shows, and toured worldwide as a keyboardist with major artists. As a Teacher and Consultant, Alex has worked with platinum songwriters, music editors, producers and composers, and conducted courses in Music Production and Music Software, including at the Songwriting School of Los Angeles. You can find more info, and contact Alex at: www.logicproanswers.com
TR-8S Ultimate Guide
This Article is part of a series called The Ultimate Guide to the TR-8S Rhythm Performer, for the Guide’s Main Page click here.

