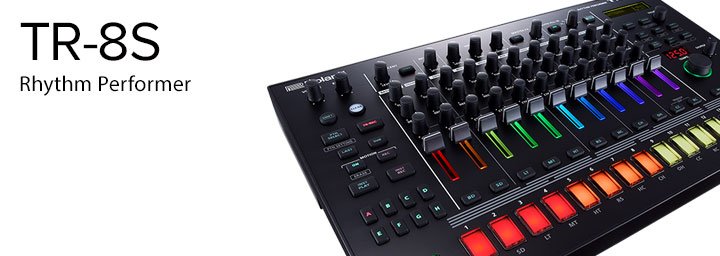
The Roland TR-8S offers extensive MIDI implementation for use with MIDI Devices, and for MIDI over USB, when connecting to your computer or another USB Device.
For example, you can set the Pattern Channel and Kit Channel independently. This can be useful in the case where you are using the TR-8S Pattern Sequencer to play another instrument connected to the MIDI Out.
You can also specify the MIDI Note Number of every Track’s Instrument. This is useful if you’re using an external MIDI Controller to play the sounds of the TR-8S, either via MIDI or USB, and you want to assign specific Instruments to play on certain keys or pads on your controller.
The TR-8S can transmit the changes you make to Kit Settings, for example when turning the Knobs on the front panel during a performance, as MIDI Messages. This is powerful stuff, as it means all of the edits you do on the Tune, Decay, CTRL, Global FX and Master FX Knobs can be transmitted as MIDI Controller Events and recorded into your sequencer!
Editing MIDI Settings
- Press the Utility Button to view the Utility screen.
- Hold Shift and turn the Value Knob to select MIDI.
- Release Shift then turn the Value Knob to select the desired MIDI Setting and press Enter.
- Turn the Value Knob to set a value for the selected MIDI Setting and press Enter.
- Turn the Value Knob to select the desired MIDI Setting and press Enter.
- Turn the Value Knob to set a value for the selected MIDI Setting and press Enter.
- Repeat steps 5 and 6 as needed.
Editing MIDI Note Numbers of Instruments
- Press the Utility Button to view the Utility screen.
- Hold Shift and turn the Value Knob to select MIDI.
- Release Shift then turn the Value Knob to select Inst Note and press Enter.
- Press the Instrument Select Button of the desired Instrument and press Enter.
- Turn the Value Knob to set the MIDI Note Number for the selected Instrument.
- Repeat steps 4 and 5 to set the MIDI Note Numbers of any other Instruments.
The General MIDI Drum Map sets out a standard for how Drum Sounds are commonly assigned to MIDI notes, for more details take a look at: https://www.midi.org/specifications-old/item/gm-level-1-sound-set
For the MIDI Controller Numbers assigned to the Knobs of the TR-8S front panel, you can find the TR-8S MIDI Implementation Chart here: https://www.roland.com/au/support/by_product/tr-8s/owners_manuals/
PRO TIP
The TR-8S can be used as a controller only, to play an External Device connected to it via USB or MIDI, without playing it’s internal sounds. To do this, set the TR-8S to Surface:- Press the Utility Button to view the Utility screen.
- Hold Shift and turn the Value Knob to select SOUND: LocalSw and press Enter.
- Release Shift then turn the Value Knob to select SURFACE.
Article written by Alex Marlowe
 Alex Marlowe is a Composer/Producer, Musician and Consultant based in Melbourne, Australia. Alex has placed music in numerous movies and TV shows, and toured worldwide as a keyboardist with major artists. As a Teacher and Consultant, Alex has worked with platinum songwriters, music editors, producers and composers, and conducted courses in Music Production and Music Software, including at the Songwriting School of Los Angeles. You can find more info, and contact Alex at: www.logicproanswers.com


