Whenever audio is imported via iTunes, it will now be saved as SPD-SX friendly, CD quality audio.
You can see the format of your existing iTunes files by ‘control’ left-clicking or right-clicking the information header pane in iTunes and choosing ‘sample rate’ and ‘bit rate’. You will now see the format of your iTunes audio files.

iTunes Bit Rate Pane
If you have existing files you want to take into the SPD-SX, simply select the file in iTunes and choose ‘Create WAV’ file from the file menu. iTunes will create a new version of the audio file at 44.1khz 16 bit.
This is the file you will use with the SPD-SX.
Simply drag and drop the new file onto a USB stick or copy it to a new, easy to find sample library folder on your hard drive named something like ‘SPDSX AUDIO’.
Keep in mind that taking a low bit rate MP3 file and converting it to WAV will NOT improve its audio quality whatsoever. It will simply make it compatible with the SPD-SX.
The only way to ensure you are getting the best possible audio quality is to get a new copy of the original audio at CD quality or by re-importing the original audio file back into iTunes from CD now that you have your new CD quality settings in iTunes.
When you do so, you will be asked if you’d like to update your iTunes library by replacing the existing files.
1. Insert the USB stick containing the audio files into the SPD-SX
4. Press the + button to select any audio files to import.
When done, you can remove the USB stick.
The audio files are now saved to the SPD-SX’s internal memory.
Even with the standard SPD-SX, there is enough space for more than 3.5 hours of audio.
FIRST STEP: Install the SPD-SX’s driver and Wave Manager software from the supplied CD. You can also download these from the Roland SPD-SX product page.
MAC & PC can see the SPD-SX as an audio interface or as a Wave Manager device when using with the included wave management software. Change the SPD-SX’s mode like this:
1. Press MENU–SETUP–OPTION–ENTER
2. Change the USB MODE to ‘WAVE MGR‘
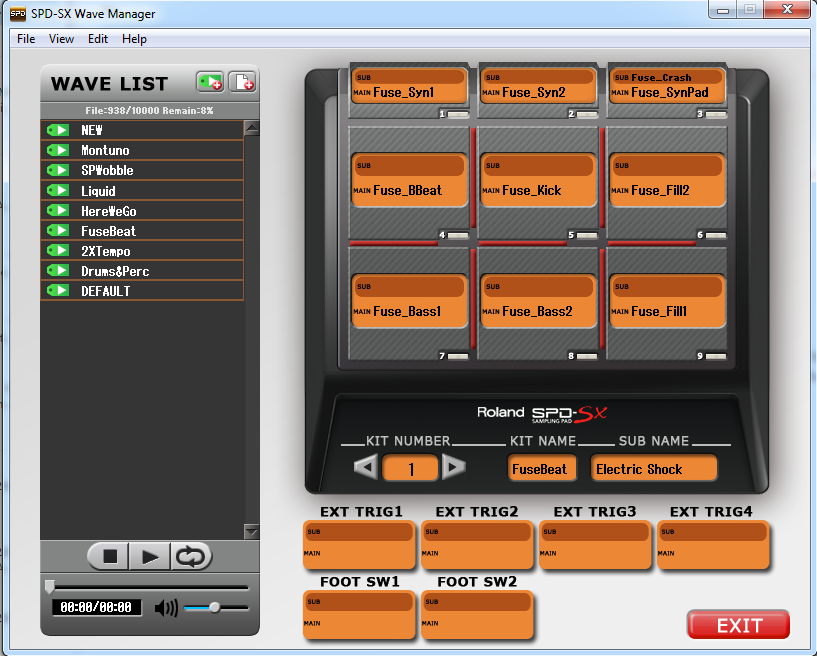
Connect the SPD-SX to the computer’s USB port. The SPD-SX will let you know the computer is connected. Launch Wave Manager and choose SPD-SX when it asks.
After a second or two, the wave manager main screen will load. This main screen reflects the current state and content of the SPD-SX. You can perform all file related functions directly via this screen including assigning samples, naming files and kits and even backing up the SPD-SX which we’ll cover shortly.
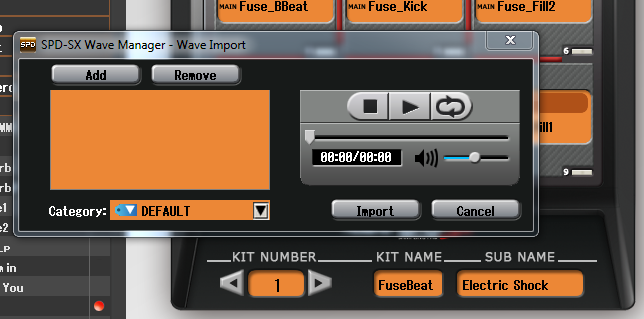
Samples are arranged in green folders. Clicking a folder will show it’s content. Remember that all the files shown are already inside the SPD-SX. To bring in new samples to use, choose ‘Wave Import‘ from the file menu.
In this new box, you can audition and click to ADD samples from any location on the computer.
These new files will be instantly imported into the SPD-SX and appear in the file list on the left.
Choose the kit then click and drag these to any pad location to assign them.
“You can assign samples to foot-switch locations too as well as external triggers on the SPD-SX. This is very handy for starting and stopping backing tracks via a foot-switch.”
When you are finished, simply exit wave manager and disconnect the SPD-SX. The SPD-SX will now return to its normal operation with the new changes you made.