Mixing is an important part of the recording and production process and is crucial for live performances. It will help take your productions to new and exciting places while expanding your own sound and style. Furthermore, the process of mixing can easily be transformed into a key element of your live performances. Welcome to the ultimate guide to the AIRA MX-1!
The humble mixer has long played a significant part in music creation and performance. Dub music for instance, was pivotal in moving the mixing console to centre stage, where it became an instrument in itself. Dub music showed the world the wondrous possibilities and creative power of the mixing desk. This demonstrated it’s use as an incredibly powerful creative tool, far beyond standard volume balancing.
Traditionally, bands rely on a live sound engineer to ensure that their music is suitably balanced for the audience, the venue and themselves. DJs and electronic artists typically take on the role of both musician and sound engineer. Therefore they require a mixer that can successfully integrate their assortment of instruments, modules and effects.
This might make perfect sense in theory, the reality is that it’s often a challenge to find a suitable mixer for combining the diverse equipment that is used by electronic artists today.
THE NEXT STEP IN THE EVOLUTION OF PERFORMANCE MIXERS
The Roland AIRA MX-1 is not like a standard mixer. In addition to working as a high-resolution audio interface and control surface, it was created with both the studio and the live performer in mind. If you want a powerful and flexible device to control all of your sounds and your gear, the MX-1 is the ideal instrument for you. Unite your AIRA gear, drum machines, synthesizers, laptops, DAW tracks, loops, external effects and more, into one cohesive, powerful unit.
Use this guide to get the most out of your MX-1 and find out why it’s so much more than just a simple volume controller.
#1: USE THE DIVERSE I/O FOR MAXIMUM SETUP
#2: SHAPE SOUNDS WITH SELECTABLE FILTERS AND TONE CONTROL
#3: SHAKE UP YOUR SOUNDS WITH BFX
#4: COMPLETELY REIMAGINE YOUR TRACKS WITH MFX
#5: USE PAN TO CREATE A WIDE AND ALL ENCOMPASSING MIX
#6: EASE TO THE STAGE WITH AUX
#7: STORE SCENES AND RECALL FOR LIVE PERFORMANCE
#8: MX-1 AS A DJ CONTROLLER
#9: MIX OUTSIDE THE BOX
#10: POWER YOUR MIX WITH MASTERING
Contributed by Hannah Lockwood for Roland Corporation Australia
TIP #1: USE THE DIVERSE MX-1 I/O FOR MAXIMUM SETUP
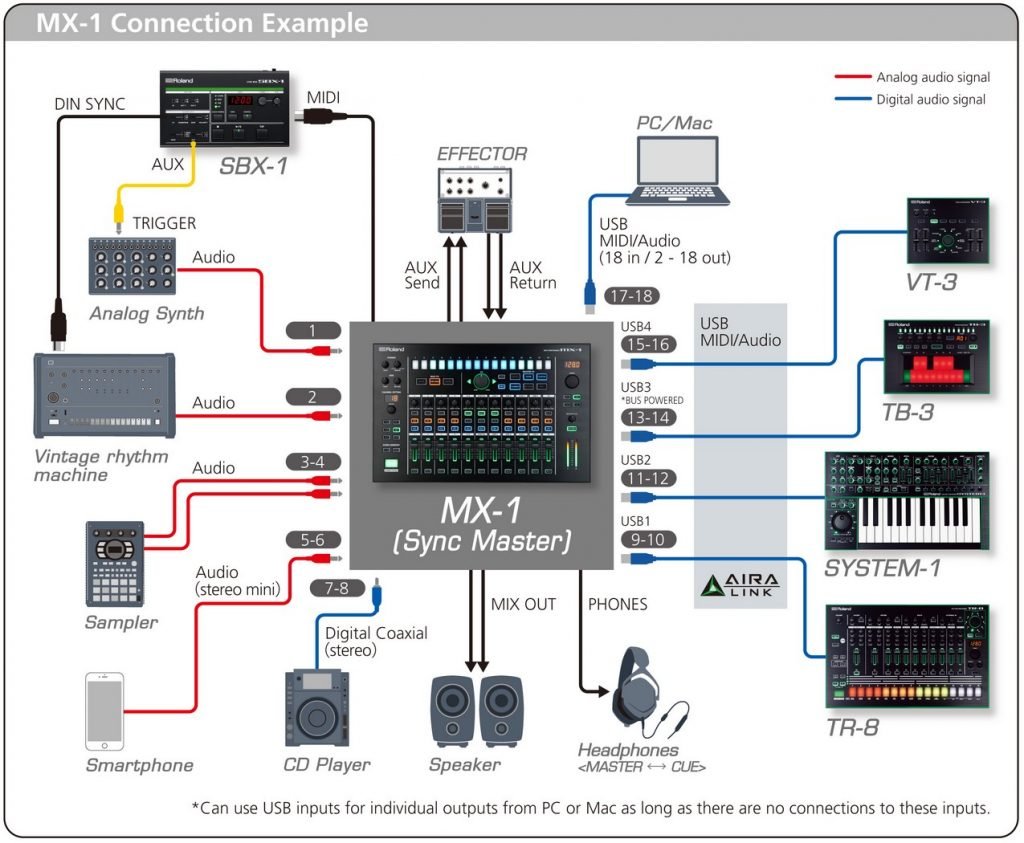
The MX-1 has 11 channels to accommodate its 18 inputs. The first 4 x 1/4” mono analog inputs can be mixed individually, or linked as stereo tracks on Channel 1 and Channel 3. There is also a 1 x 1/8” stereo input, Digital Co-Ax I/O and an AUX Send and Return for connecting outboard effect boxes.
The remaining channels are dedicated to the 4 AIRA Link USB Host ports. These allow you to send and receive audio, MIDI and Sync data via a USB connection. Furthermore, USB Port 3 allows you to power your AIRA or Boutique gear from the port itself, without the need for connecting to an external power supply.
When connecting your MX-1 to the rest of your AIRA gear, its true potential is revealed. Seamlessly integrating with AIRA devices, like the TR-8, TB-3 and Roland Boutiques, it can become the master hub of your studio or live rig. The MX-1 allows for transport control, so start and stop can be done from the MX-1 itself, controlling all connected gear.
MX-1 Connectivity
The MX-1’s USB connectivity means that you can stream 18 channels to and from your DAW! This is where things can get really creative, as it enables you to combine your analog sources with digital effects from within your DAW. Acting as a controller for your DAW, the MX-1 can mix audio from your computer with a simple USB connection.
To change your mono Analog Channels to linked Stereo Channels, select the [GAIN] button, then hold the [SELECT] buttons of Channels 1 and 2 simultaneously. Use the [VALUE] knob to turn CHANNEL LINK ON or OFF. When STEREO LINK is turned ON, the second channel will be blacked out and all control will be accessed via the first channel.
By default, the audio from your computer is fed to the PC Channel on the mixer. If no AIRA devices are connected to the USB Host ports, you can direct your DAW audio to be input into USB Channels 1 – 4.
In addition to mixing the sounds of AIRA products and other hardware, the MX-1 can work with a DAW on your computer. This way, you can mix the playback of the DAW and operate as a DAW controller. To use the MX-1 with your DAW, please see Tip #9.
FROM STUDIO TO STAGE: THE ELECTRONIC MUSICIAN’S GUIDE TO GIGGING
TIP #2: SHAPE SOUNDS WITH SELECTABLE FILTERS AND TONE CONTROL
Each channel on the MX-1 has a volume fader with a choice of six definable volume curves, a dedicated MUTE button and a TONE/FILTER knob that sits atop the channel.
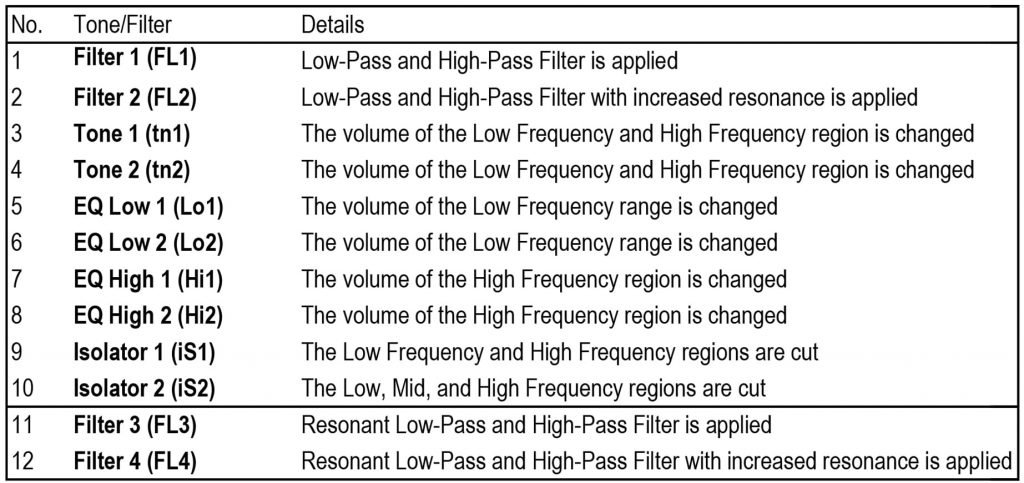
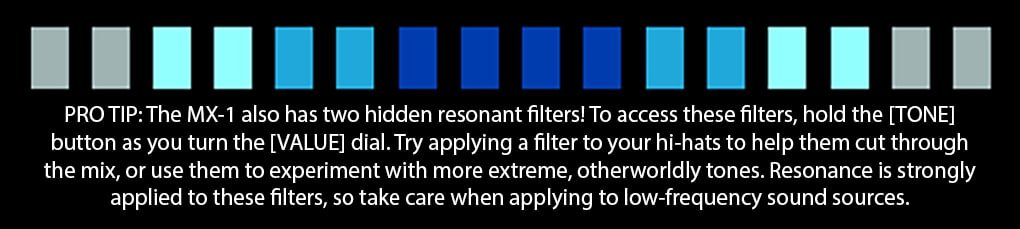
The MX-1 contains 10 different types of TONE/FILTER settings, which can be assigned independently to each channel. By default, each TONE/FILTER knob is set to “FILTER 1.” To change the mode, press the [TONE] button so that it lights up. Then [SELECT] the button of the channel you wish to change.
Turn the [VALUE] knob to select the TONE/FILTER type. Below are the different TONE types and their key function.
Parameter shortcuts and functions
The MX-1 filters work in a similar manner to the filters found on some DJ mixers. Turning the [TONE/FILTER] knob to the left engages a low-pass filter. Turning the knob to the right engages the high-pass filter.
Each different TONE type will affect your audio in a particular way. Experiment by applying different TONE types to different audio signals. Some will be more suited to your drums tracks, others to bass and lead lines. Use the [TONE] control to get the most out of your sounds and to heighten your overall performance.
The [TONE] knobs can also act as controls for directly editing other various parameters. This is useful for live performances, as it is a more accessible and time-efficient way to change parameters. Holding the [PAN] button while turning the [TONE] knob will allow you to PAN, without having to use the [VALUE] control knob.
Holding the [AUX] button will make the [TONE] knob determine the SEND level for each channel. The same approach applies when holding [BFX], which changes the [TONE] knob into a BFX DEPTH level control.
These functions can be used as simple studio shortcuts or applied creatively to live performances. Utilizing these shortcuts will vastly improve the flow of your live performances. Master these quick controls and leave more time to focus on your music making!
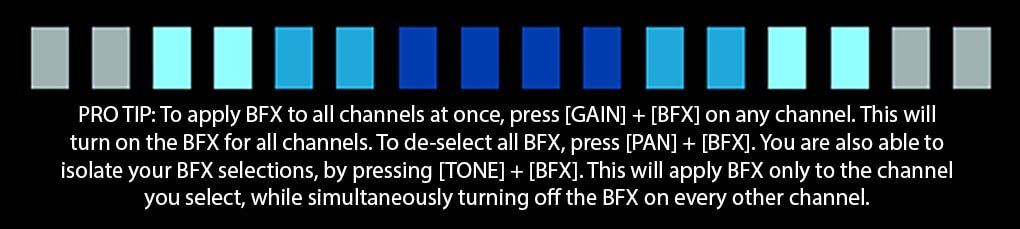
TIP #3: SHAKE UP YOUR SOUNDS WITH BFX
Manipulating your track with BEAT FX is a great way to get creative. The BEAT FX engine gives you the choice of a Filter, Sidechain or Slicer effect for each channel of the mixer. This allows you to apply a single effect independently to each channel and to sequence the effect, so that it is triggered at specific steps. The three BEAT FX include:
FILTER: A filter is used to define the highest and lowest frequencies of a signal, by passing or filtering from a certain point. A high-pass filter allows all audio above a certain frequency to pass, while a low-pass filter allows all audio below a certain frequency to pass. Filters help you to control and balance your mix by removing unnecessary information. They are also commonly used as a creative tool, to generate interest and movement within a performance.
SIDE CHAIN: Sidechaining ducks the audio signal on selected steps, determined by the built-in step sequencer. This allows you to create a “pumping” or “ducking” effect. This effect is very popular in electronic dance music. It also works to help one or multiple channels sit at the forefront of a mix, while leaving other channels to be ducked. It is commonly used on basslines and pads, hitting each time the kick drum sounds. This helps to keep your kick drum punching through the mix.
SLICER: A slicer is somewhat of an instant percussive groove generator. It cuts up the incoming signal into rhythmic variations, as determined by you. It can instantly transform your incoming bass or lead sound into a pumping groove rhythm.
MX-1 Effect Variations
Similar to the TONE/FILTER control, the BEAT FX engine includes five variations on each effect type. To change the effect type, hold down the actual FX button of your choice – [FILTER], [SIDE CHAIN] or [SLICER] – and turn the [CHANNEL SETTINGS] knob. All of these settings can be stored as SCENES and recalled during a performance, which we’ll look at in #TIP 8.
Use the sequencer section to independently duck, filter and slice each channel to create interesting rhythmic variations to your music. These effects are not set to a 16 step sequence, and can be shortened to create more interesting rhythmic variations. This can also introduce a polyrhythmic feel to your music.
Apply these effects to any or all inputs, simply by pressing the [BFX] button for each channel. When lit, the effects are engaged for that channel. The effects are there to inspire creativity and help to elevate the MX-1 from other standard mixer. Use them to take your live set or productions to unexplored sonic areas!
TIP #4: COMPLETELY REIMAGINE YOUR TRACKS WITH MFX
The MASTER FX allows you to apply a MASTER FX chain to all channels of the MX-1, acting as a global effects engine for the entire mixer. There are six effects to choose from, each with their own variations and control. MASTER FX are the key to taking full advantage of the MX-1 as an instrument and are powerful performance tools for live sets and studio use.
MASTER FX can be applied independently to each channel, by pressing the corresponding [MFX] button on each channel. The six effects include:
DELAY: Delay is a time-based effect in which an incoming signal delays and then plays back at a determined time after the original signal.
FILTER: Filtering is a type of signal processing that allows you to suppress part of the incoming signal at a frequency point. This is determined by the cutoff point.
SCATTER: An exclusive Roland effect, the SCATTER function works by chopping up the Master Output of the MX-1 into new rhythmic variations.
FLANGER: Flanging is the process of combining two identical copies of the same audio signal, with the second signal slightly delayed to produce a whooshing, swirling effect.
BIT CRUSH: The BIT CRUSH effect works by reducing the resolution of your audio signal. It is a great way to add grittiness to your clean drum sounds.
ROLL: ROLL, also referred to as Note Repeat, is a tool that allows you to repeat specific notes, replicating their pitch, signature and note length for a determined amount of time.
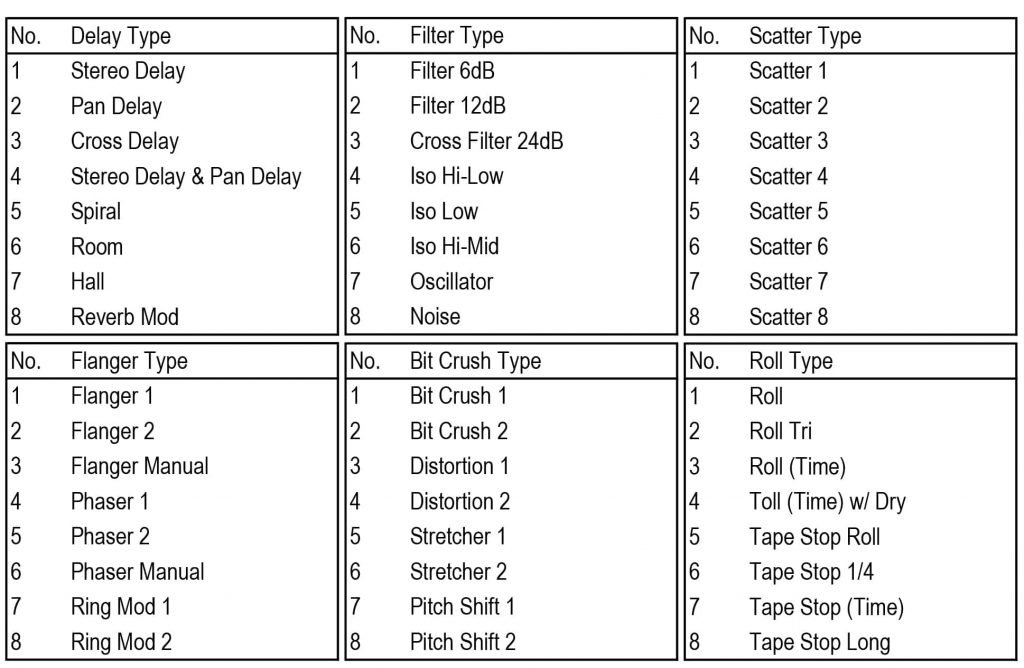
Master FX Combination
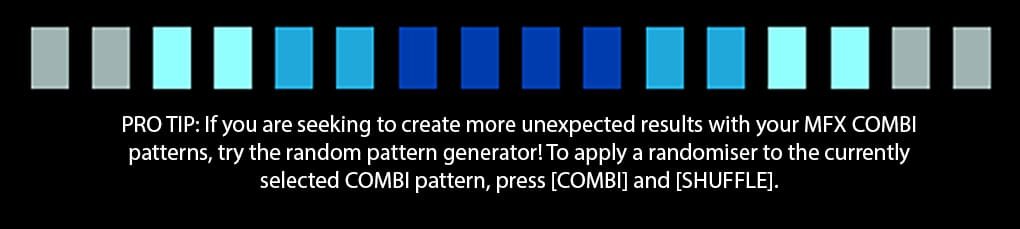
Each of the MASTER FX have eight variations of the effect type, specified in the table below. To change these, simply hold down the effect you wish to change and turn the [TEMPO] dial. To use multiple effects together, hit the [COMBI] button. COMBI allows you to use multiple effects at once and also activates the step sequencer for the MFX.
By pressing the [COMBI] button, you can add one of the six different MASTER FX to each step of the sequencer. Choose from DELAY, FILTER, SCATTER, FLANGER, BIT CRUSH and ROLL and carefully select how each effect will relate to one another and your incoming audio signal.
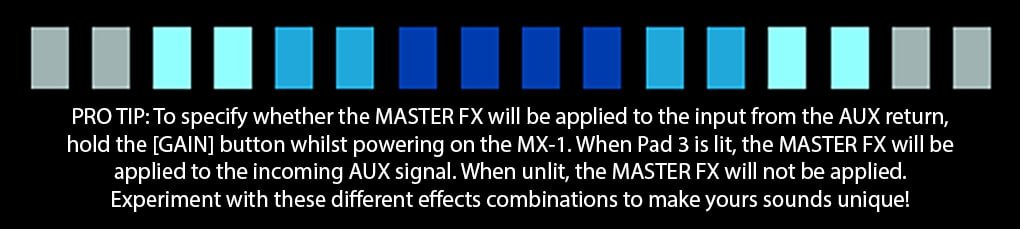
To change the COMBI settings press [COMBI] and turn the [TEMPO] knob and then experiment with all the different MASTER FX combinations. You can also clear a COMBI pattern by pressing [PAN] and [COMBI]. Alternatively you can also press [PAN] + each [EFFECT] button + pad (1–16). These actions will clear the currently selected COMBI pattern. N.B. – The pattern will be overwritten, so Undo is not possible.
MX-1 Synchronisation
The tempo of these effects is automatically synced to the Master Clock. To cancel EFFECT SYNC, hold the MASTER FX [TIME] button + [DELAY] button and turn the [VALUE] dial. As the default setting, SYNC ensures the DELAY/FLANGER time is synchronized with the tempo.
Turn the [VALUE] dial to OFF to deactivate synchronization. Now, you can specify the delay time as a numerical value in milliseconds by holding the [TIME] button and turning the [TEMPO] dial.
The MASTER FX are a unique way to further tailor your sound and a great way to take your performance to the next level. Use it for breakdowns, drops or just general chaos! All effects are synchronized to the MX-1, allowing for tonal and rhythmical changes to your incoming sounds.
Use the sequencer section to make each MASTER FX your own. Create glitchy interludes, build up to a drop, or completely shift your sounds with just the turn of a knob.
TIP #5: USE PAN TO CREATE A WIDE AND ALL ENCOMPASSING MIX
No mixer is complete without the ability to place sounds across the stereo field. Panning may not seem like the most exciting performance or production technique, however it is imperative to getting the most out of your mix! Panning is the act of distributing a sound source over a stereo or multi-channel sound field.
It is how we achieve space and dimension in a mix, and how we create movement. Panning can be used as a technical tool, to balance sound and frequency. Often it is used to mimic real life scenarios such as the panning of a drum kit to replicate a drummer’s seated position. It is also an incredibly useful creative tool and a necessary part of music production.
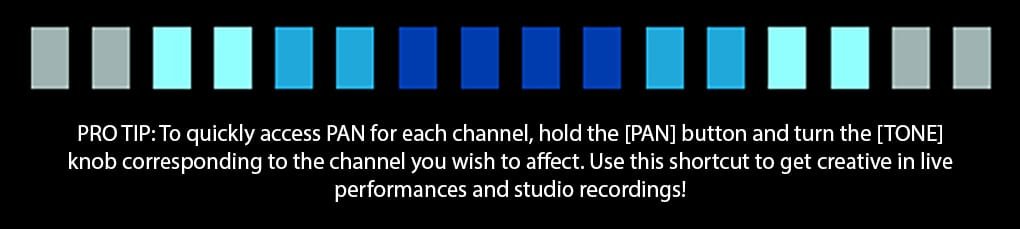
To adjust the PAN of each channel, press the [PAN] button so that it lights up. Then press the [SELECT] button on the channel you wish to adjust. Turn the [VALUE] knob left or right to PAN the channel across the stereo field.
By panning different sounds, you will create space and clear up the centre of the mix. This is generally where you will want your kick, snare, bass and vocal tracks sitting. Spread similar sounds across the stereo field to give them space and clarity. Panning can also be used as a performance element, to create movement in your tracks. Take advantage of the full stereo spectrum and experiment with panning!
TIP #6: GET CREATIVE WITH AUX
The AUX Section of the MX-1 is designed to help you to create the perfect mix, both onstage and in the studio. The DJ-style cue monitoring allows you to audition individual channels before mixing them into your main mix.
This is an incredibly useful tool for live performance, particularly if you like to improvise on multiple sound sources live, or plan on using your MX-1 for DJ-style performances.
Using effects pedals as a Send/Return is another key component to many live performance setups. The MX-1 offers RCA AUX connections, making it possible for you to connect your favourite external effects pedals or processors to your mixer.
This is another element that can take your performance to the next level. It can help you to create your own individual sound that can’t be easily replicated by others. While many standard pedals are 1/4″ jacks, all you need are two RCA to 1/4″ cables.
To set the SEND level for each channel
- Press the CHANNEL SETTING [AUX] button so that it lights up.
- For each channel that you want to send to the AUX SEND jacks, press the [SELECT] button so that it lights up.
- Rotate the [VALUE] knob to adjust the SEND level.
- Turn the [SEND] knob to adjust the output volume of the AUX SEND jacks.
- Turn the [RETURN] knob to adjust the output volume of the AUX RETURN jacks.

Adding Effects Pre or Post Fader
By utilising the MX-1’s AUX SEND/AUX RETURN outputs and inputs, it is possible to use effect pedals with the MX-1. The AUX SEND/AUX RETURN slots are stereo, so it would be ideal to hook up a stereo unit such as the BOSS DD-500 or BOSS RE-20. The DD-500 is also able to MIDI sync to the tempo of the MX-1 and other MIDI units.
The AUX SEND can be set to either PRE or POST-FADER. Adding effects via AUX SEND PRE-FADER means that your external effect is affecting your sound source before it’s mixed with the rest of your sounds. This allows you to creatively experiment with the external effect before you add the MX-1’s internal effects as well.
Adding external effects POST-FADER gives you the benefit of manipulating your sound even further, after it passes through the MX-1’s routing and has been defined as part of your overall mix. Some effects tend to work better POST-FADER, such as reverbs, delays or other time-based effects, but there are definitely no hard and fast rules. Try experimenting with both the PRE and POST-FADER settings and find what works best for you.
Using your effects pedal as a SEND/RETURN, rather than an INSERT, enables you to utilise the effect on a number of different sound sources. This allows you to control the level of SEND (or how much of the external effect you want) for each individual instrument. This is a great way to heighten a live performance and can add depth and dimension to studio recordings.
TIP #7: STORE SCENES AND RECALL FOR LIVE PERFORMANCE
The MX-1 offers the ability to store and recall SCENES, allowing you to instantly recall different mixer states, with all settings and effects configurations. Storing and recalling SCENE MEMORIES provides further control for live performances and a great way to get the most out of the mixer. This will ensure a fluid and seamless performance.
Imagine being able to set up multiple incarnations of your mixer and recall them when necessary! This function ensures reliable live performances and offers more control over all instruments in your setup.
When you store a SCENE MEMORY, the current settings for the channels, effect section, and mixer section are saved in the MX-1 as a single SCENE. You can then recall the stored settings at a later time.
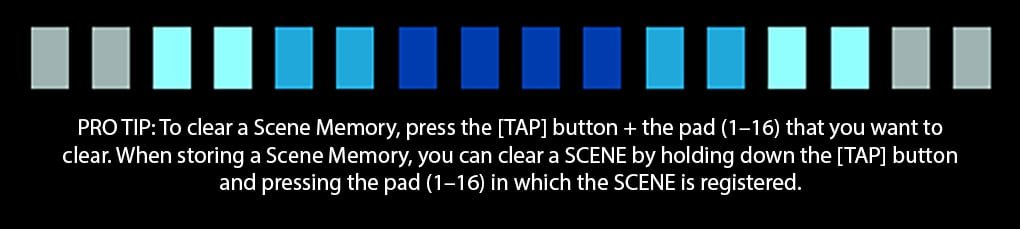
To store a SCENE
- Press the [STORE] button so that it lights up.
- Use the [VALUE] knob or pads [1]–[16] to select the SCENE NUMBER that you want to store. The [STORE] button blinks.
- Press the [STORE] button to store the settings.
To recall a SCENE
- Press the [RECALL] button so that it lights up.
- Use the [VALUE] knob or pads [1]–[16] to select the SCENE NUMBER that you want to recall. If you used pads [1]–[16] to select a SCENE, the SCENE is recalled immediately. Alternatively, you can use the [VALUE] knob to select “NAn (Manual),” which makes the MX-1 use the current settings of the [TONE/FILTER FX] knobs and [LEVEL] faders.
- If you used the [VALUE] knob to select a SCENE, press the [RECALL] button to recall the SCENE.
Use this simple function to perform SCENE changes and help take your performances to the next level!
TIP #8: AIRA MX-1 AS A DJ CONTROLLER
A key component in most live electronic dance music performance is the seamless transition between songs. The MX-1 achieves this through its DJ-style cue function, which can be used to monitor input sources via headphones without affecting the main mix outputs. This is an essential feature for checking sources and dropping in tracks right on time. It’s also the perfect way to add dimension and heightened control to your live performances.
Using headphones with the MX-1 allows you to listen to the MASTER audio simultaneously with the sound of the channel selected by the [SELECT] button. If you lower the level of the selected channel or mute it, you can still hear it by turning the [MIXING] knob to the SELECT position.
The [LEVEL] knob adjusts the headphone output while the [MIXING] knob adjusts the balance between the MASTER OUTPUT and the channel whose [SELECT] button is lit. This PRE-FADER listening option makes it possible to use the MX-1 as a DJ mixer. Use this feature to prepare your next song or sound, before bringing it into the master mix.
Integration with CDJ’s
Connect your CDJs via the analog inputs (see #TIP 1 for STEREO LINK) using RCA to 1/4″ adapters and you have access to the MX-1’s range of BFX, MFX and TONE controls! If you DJ from a laptop, you are able to route several tracks of DAW audio to channels on the MX-1 via its PC connection.
In standard MIXER mode, DIGITAL and PC Channels can receive audio from your computer, as long as there are no connections made to these inputs. From your DAW, OUTPUT 7/8 will send to the MX-1’s DIGITAL Channel and OUTPUT 17/18 will be sent to the PC Channel.
The NUDGE function on the MX-1 allows you to temporarily speed up or slow down the MASTER TEMPO in order to sync with audio from another source. The result is similar to a DJ speeding up or slowing down a record to beatmatch it to another record. This function is invaluable if you are looking to combine your sounds with external sources or tracks.
To access NUDGE MODE
- Hold down the [SHUFFLE] button and press the [FINE] button. When the [SHUFFLE] button and [FINE] button are lit, the [SYNC] button and [TAP] button are blinking, then the MX-1 is in NUDGE MODE.
- With the sequencer started, press the [SYNC/TAP] button. Pressing the [SYNC] button “holds” the tempo (BPM -5). Pressing the [TAP] button “pushes” the tempo (BPM +5).
- To cancel NUDGE MODE, once again hold down the [SHUFFLE] button and press the [FINE] button. When NUDGE MODE is active, the TEMPO knob changes to the tempo with a decimal point.
Seemless integration and adaptability
It is rare for a mixer to flourish in studio, venue and club environments. What makes the MX-1 so useful is its unique ability to move effortlessly between these differing setups. Whether you’re plugging in your CDJs or playing tracks from a computer, the MX-1 is a great DJ mixer, with the added bonus of hosting a range of other input channels for external instruments and effects to be included in your set.
The line between a DJ/Live set continues to be blurred, and versatile tools like the MX-1 encourage artists and DJs to push themselves and their art form.
TIP #9: MIX OUTSIDE THE BOX
The MX-1 operates in three different MODES that can be interchanged depending on your needs. The default mode is MIXER MODE, which offers six Analog, one Digital Stereo, four AIRA and two PC Channels on the MX-1. This mode can be used when you are wanting to mix and playback your AIRA gear or other hardware instruments. CONTROL SURFACE MODE gives you full control of your DAW via MIDI.
In EXTERNAL MIXING MODE, 18 channels of USB audio output are assigned to the faders of the MX-1. The MX-1’s faders control the level of output from Ableton Live as well as mixing volume. You can also apply PAN and other effects while you perform in real time. EXTERNAL MIXING MODE can dramatically change the way you use your MX-1, turning it into a useful controller, compatible with DAWs like Ableton Live.
To switch between these different MODES
-
- While holding down the MX-1 [GAIN] button, turn on the POWER.
- Press the MX-1 [TONE] button.
- Turn the MX-1 [VALUE] knob and select MIX, SUR or EXT.
- Press the MX-1 [START/STOP] button to save the settings.

With the recent driver update, a new mode was added to the MX-1’s already impressive versatility… ABLETON LIVE MODE! Offering even more integration with Ableton Live, in this mode, several features of Ableton Live can be controlled by the MX-1, including control over Track settings, adjusting Send level and the ability to Record, Arm, Solo, select Tracks, launch a Clip or a Scene and control Returns. This mode can only be accessed via the MX-1’s EXTERNAL MIXING MODE.
To move into ABLETON LIVE MODE
- Enter EXT Mode.
- Hold down the MX-1 [RECALL] button and press the [STORE] button.
The upper right display on the MX-1 will now indicate LIVE. If you want to return to EXTERNAL MIXING MODE, hold down the [RECALL] button and press the [STORE] button again.
ABLETON LIVE PERFORMANCE MADE EASY WITH NEW AIRA MX-1 MODE
For more information on EXTERNAL MIXING MODE, please refer to this doc: https://static.roland.com/assets/media/pdf/MX-1_ExtMix_e01.pdf
For more information on ABLETON LIVE MODE, please refer to this doc: https://static.roland.com/assets/media/pdf/MX-1_LiveMode_e01.pdf
TIP #10: POWER YOUR MIX WITH MASTERING
The MX-1 offers a unique MASTERING chain of audio signal processors at its Main Output! Mastering is a crucial aspect of music production and a necessary stage in the process of releasing music. In the digital realm, mastering is the act of “cleaning and polishing” a mix, to prepare it for commercial release.
A mastering engineer works to correct any problems with your final mixdown, from tonal and level imbalances, stereo imaging and controlling excessive sub information. This is achieved through finely tuned equalisation and compression. The mastering engineer then adds the final polish to the mix, through further equalisation, compression and/or limiting.
Typically, a limiter is used to catch the highest peaks in a mix, subsequently reducing the dynamic range in order to raise the overall volume of the track. Doing this will make the track louder and more “full” sounding than it did before final processing.
Virtually all recorded and released music goes through the mastering process. The same cannot be said for music that is created and performed live. The process of mastering is difficult to replicate in a live situation – the closest that one could get to achieving a similar result would be through the use of a limiter or a compressor on the master output of their setup. The MX-1’s Mastering effect is an incredibly useful tool that will add further control and power to your live mix.
Enabling the Mastering Effect
To enable the Mastering effect, press the [MASTERING] button so that it lights up. Hold down the [MASTERING] button and turn the [TEMPO] knob to select the type of MASTERING chain that you’d like to use. There are 10 different Mastering presets to choose from, each with their own unique signal chain, shown in the table below.

The Mastering chains comprise of EQ curves, a Low-Cut, an Enhancer, Compression, Limiting and Stereo Imaging in various orders of sequence. These chains are designed to give your mixes an overall clarity and that final, crucial boost.
You can use the MX1’s Mastering effect in the studio to give your demos a professional lift, but live performance is where the MX-1’s Mastering function really displays its power! It’s a very useful feature to use if you are sharing the stage with DJs, who will be playing mastered audio files.
Using the MX-1’s Mastering will help you to avoid the dip in volume that often occurs during the transition from DJ to live act. Experiment with the different Mastering types to find the right chain for your mix!
Conclusion
The MX1 is a powerful and flexible device that allows you to get the most out of your mixing. With seemless integration and diverse operational modes, it’s a unique creative tool to have either in the studio or on stage!
Related Articles
ABLETON LIVE PERFORMANCE MADE EASY WITH NEW AIRA MX-1 MODE
USING YOUR ROLAND BOUTIQUE WITH ABLETON LIVE
SEVEN MORE HIDDEN FEATURES OF THE ROLAND BOUTIQUES
FROM STUDIO TO STAGE: THE ELECTRONIC MUSICIAN’S GUIDE TO GIGGING
TR-09 VS. TR-8
TB-03 VS. TB-3
TR-8 AND EFFECTS – PART 2: PEDALS
Related Product